
If you’ve ever needed a dessert that makes people stop mid-conversation and go, “Wait… who made THIS?”—then let me introduce you to my ride-or-die sweet dish: the Black Forest Trifle.
I swear, every time I bring this dessert to a potluck, someone tries to claim it as their “new specialty” (you know who you are, Linda). I started making it years ago when I wanted something that looked dramatic without requiring the emotional breakdown of assembling a three-layer cake. Ever tried frosting a cake at midnight? Yeah… hard pass.
This trifle gives you all the nostalgic Black Forest flavors—rich chocolate, cherries, fluffy cream—without the drama. And honestly, it tastes even better because it’s messy on purpose. A dessert that forgives your mistakes? Sign me up.
If you’re here because you’re hunting for something gorgeous, delicious, and ridiculously easy, well, friend… you’re in the right kitchen. 🙂
Why I’m Obsessed With This Black Forest Trifle
Confession: I love a dessert that looks like it should be on a magazine cover but takes me less than 20 minutes to prep. This trifle nails that.
Here’s why I keep making it on repeat:
- It layers beautifully in a clear glass trifle bowl (I love the Libbey Trifle Bowl—you can find it on Amazon).
- It uses pantry staples or store-bought shortcuts.
- It feeds a crowd without doubling anything.
- It tastes even better the next day.
- It feels fancy without the stress of actually being fancy.
And, IMO, the best part? It always disappears first at the dessert table.
The Flavors That Make This Dessert A Hit
If you’ve ever had a classic Black Forest Cake, you know it’s all about:
- Deep chocolate cake
- Cherries
- Whipped cream
- Chocolate shavings
The trifle version keeps the signature flavor profile but rearranges it into something easier and—dare I say—better?
I mean… you get chocolate cake soaked with cherry juice. What’s not to love?
Ever wondered why people love cherry-and-chocolate desserts so much? Because the sweetness and acidity from the cherries cut through the richness of the chocolate like magic. It’s basically dessert chemistry working in your favor.
Ingredients You’ll Need
Everything here is simple. You probably have half of it already.
For the Chocolate Layer
- Chocolate cake (baked from a mix or homemade—no judgment here)
- Or even brownies (super decadent option)
I’ve used everything from boxed Duncan Hines Devils Food Cake Mix to leftover chocolate cupcakes I didn’t feel like frosting. Use whatever chocolate base you love.
For the Cherry Layer
- Cherry pie filling
- Or homemade cherry sauce (if you’re feeling extra)
Sometimes I mix in a little Luxardo Maraschino Cherry Syrup because it’s honestly liquid gold.
For the Cream Layer
- Heavy whipping cream
- Powdered sugar
- Vanilla extract
A stand mixer works best here—my KitchenAid Artisan Stand Mixer has survived years of over-whipping and under-washing. 😉
Step-by-Step: How I Make My Black Forest Trifle
Step 1: Bake Your Cake (Or Don’t)
If I’m feeling put-together, I bake a chocolate cake from scratch. If I’m feeling human, I grab a chocolate cake mix and call it a day.
Once it cools, crumble the whole thing with your hands. This is the part where I always “accidentally” eat a few chunks. Quality control, right?
Step 2: Prep Your Cherries
Cherry pie filling works perfectly, but sometimes I add a splash of cherry juice or even a tablespoon of Kirsch if kids aren’t eating it.
If you want the cherries to taste brighter, heat them on the stove for 3–4 minutes with a squeeze of lemon.
Step 3: Make the Whipped Cream
I pour heavy cream right into my mixer bowl (pro tip: use a stainless steel mixing bowl that’s been chilled for 10 minutes).
Add vanilla and powdered sugar, then whip until you get medium-stiff peaks. Not too soft, not too stiff—kind of like when you’re “trying” to fold laundry but actually scrolling on your phone for 45 minutes. 😉
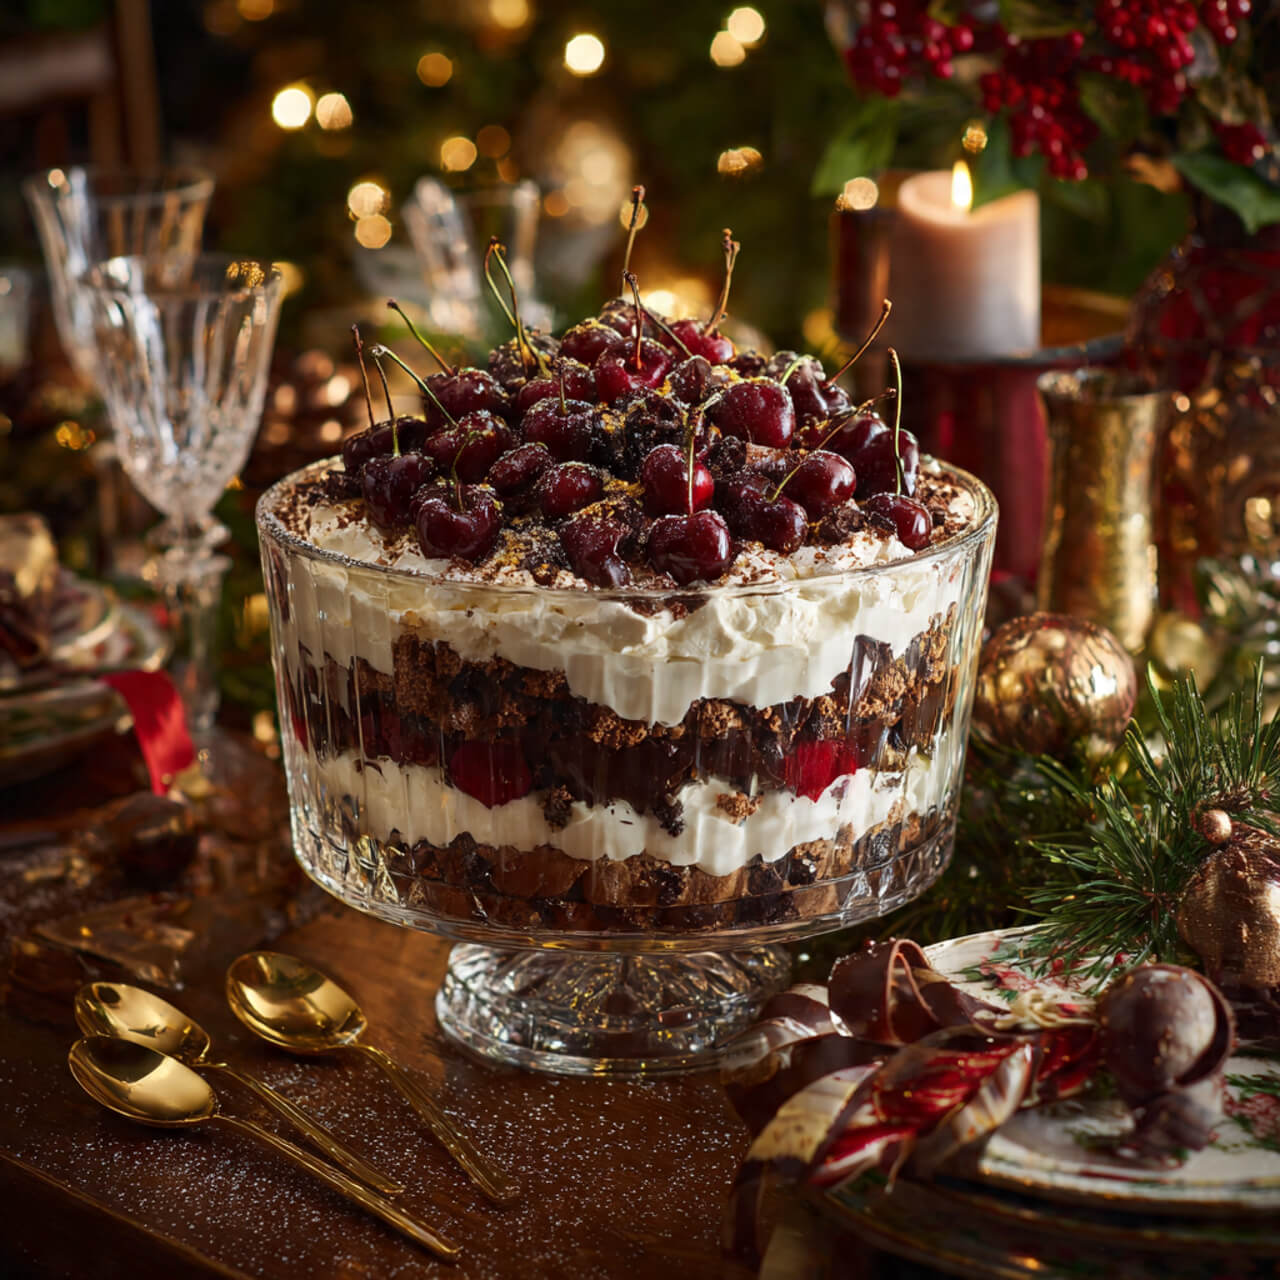
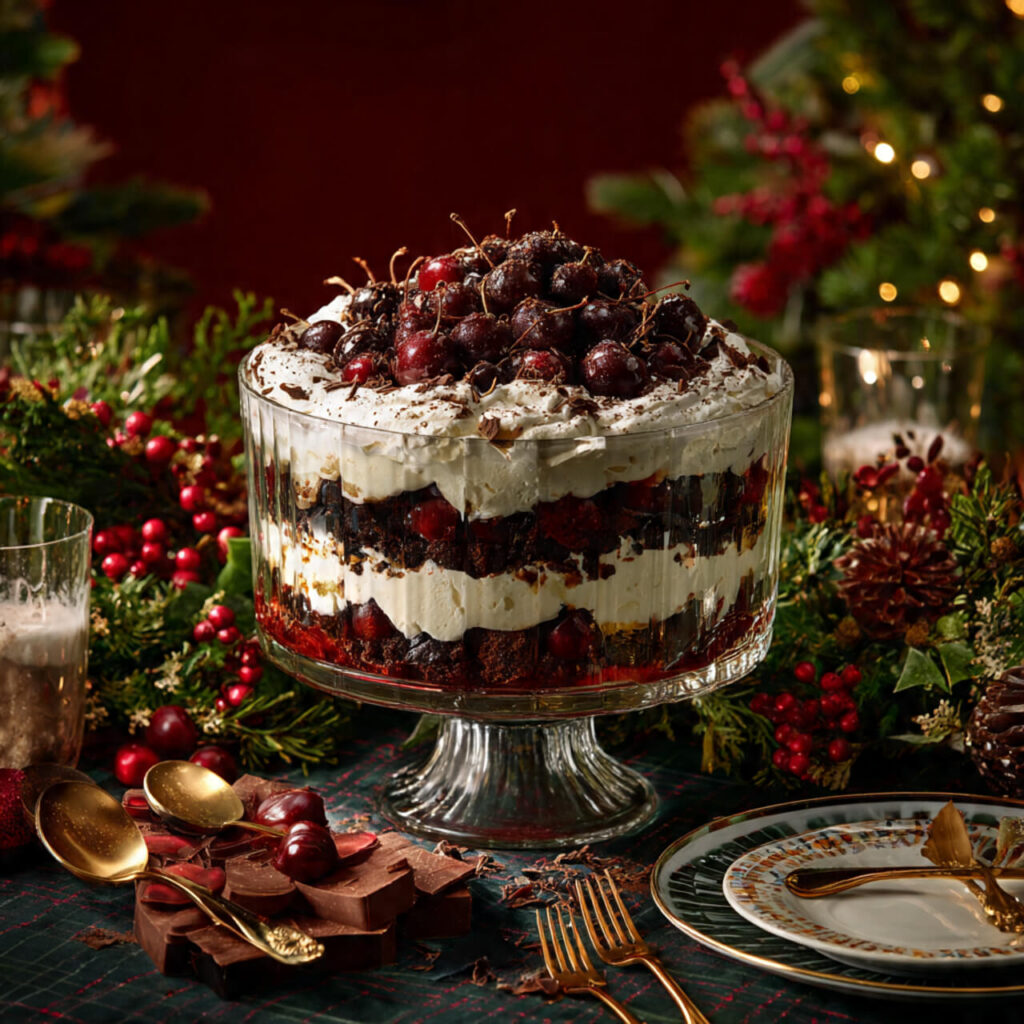
Step 4: Start Layering
Grab your trifle bowl and layer like this:
- Crumbled chocolate cake
- Cherry filling
- Whipped cream
Repeat the layers until you reach the top, ending with whipped cream.
If you want it extra pretty, add chocolate curls on top. A bar of Ghirardelli dark chocolate and a vegetable peeler will change your life.
Step 5: Chill It
Let it sit for at least an hour. Four hours is better. Overnight is chef’s kiss because the flavors mingle like friends at a backyard cookout.
Tips & Tricks I’ve Learned Over the Years
1. Use Cold Equipment for the Cream
Cold bowl + cold whisk = faster whipped cream.
No idea why, it just works. Dessert magic.
2. Don’t Overthink the Cake
Cake mix? Use it.
Leftover brownies? Use them.
Chocolate muffins you forgot you bought? Yep, those too.
3. Adjust the Sweetness
If you prefer desserts that won’t send you into a sugar coma, add a little lemon zest to the cherry layer.
4. Let It Sit
The longer the trifle chills, the better the flavors blend.
I usually assemble it in the morning for evening dinners.
5. Use a Real Trifle Bowl
A deep glass bowl with straight sides makes the layers look dramatic. The Libbey Glass Trifle Bowl is my personal favorite because it’s sturdy enough for travel and dishwasher-safe.
6. Add Texture
If you want to get fancy, throw in:
- Mini chocolate chips
- Chocolate wafer cookies
- Shaved chocolate
Crunch + cream is always a win.
Ingredients
Method
- Crumble the chocolate cake.
- Whip cream with sugar and vanilla.
- Layer cake → cherries → whipped cream in trifle bowl.
- Repeat layers and top with chocolate curls.
- Chill before serving.
Notes
- Cold whipped cream equipment helps achieve perfect texture.
- Cake mix works beautifully—no need to bake from scratch.
- Let the trifle chill long enough for flavors to blend.
- If you want a stronger cherry flavor, add cherry juice or Kirsch.