

Hey there, fellow food lovers! Picture this: it’s a Friday night, the game’s on TV, and you’ve got a crew of friends crashing at your place. You need something quick, cheesy, and impossible to resist. That’s when I whip up my cheesy garlic bread bites – little explosions of garlicky goodness that disappear faster than you can say “extra napkins.” I’ve been making these for years now, ever since I first tried a version at a pizza joint in Chicago that left me hooked. They’re crispy on the outside, melty in the middle, and perfect for dipping in marinara. Ever had one of those moments where you burn your mouth on the first bite but can’t stop anyway? Yeah, that’s these.
I love how versatile they are – they’re not just an appetizer; they’ve saved many a weeknight dinner around here. As someone who’s experimented in the kitchen more times than I can count (and burned a few too many batches), I’ll walk you through my foolproof way to nail cheesy garlic bread bites. We’ll chat about ingredients, tips to avoid common pitfalls, and why these rank high in my book of crowd-pleasers. Ready to get your hands buttery? Let’s dive in – or should I say, pull apart?
Why Cheesy Garlic Bread Bites Steal the Show
You know how some snacks sound fancy but take forever? Not these. My cheesy garlic bread bites recipe comes together in under 30 minutes, and it’s all thanks to simple stuff you probably have in your pantry. I remember the first time I made them for a family BBQ – my brother-in-law, who’s picky about textures, devoured half the pan and asked for seconds. That’s the magic: they hit that sweet spot between comforting and indulgent.
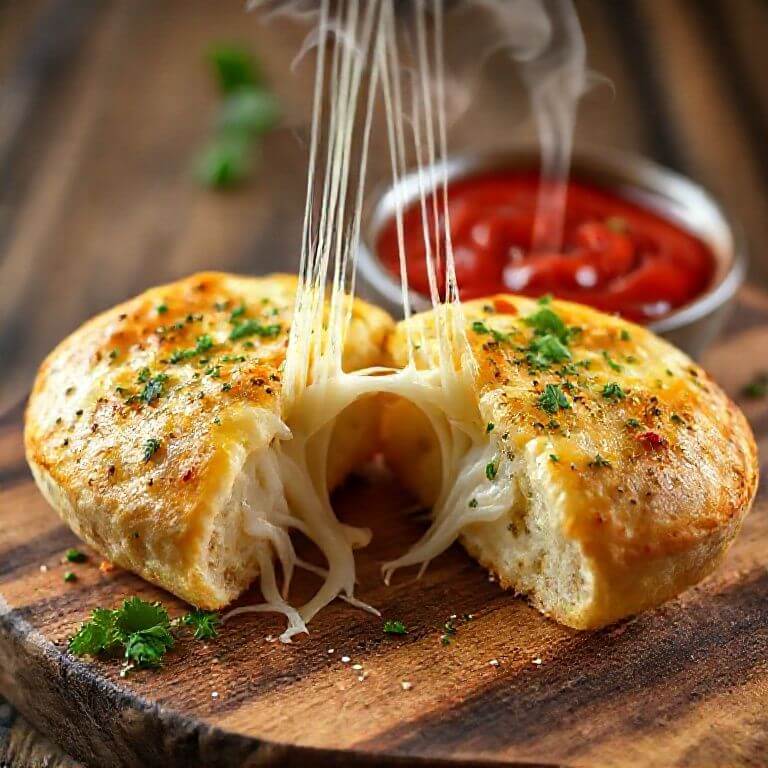
What makes them so addictive? The garlic butter soaks into soft dough, while gooey mozzarella pulls apart like taffy. FYI, if you’re watching portions, one serving clocks in around 150-200 calories each, depending on your cheese choices. But honestly, who counts when they’re this good? In my experience, adding a pinch of red pepper flakes gives them a subtle kick that keeps things interesting without overwhelming the cheese.
Top recipes online rave about variations, like stuffing with pepperoni for a pizza twist or baking in a cast-iron skillet for extra crisp. I’ve tried both, and the skillet method? Game-changer. It creates those buttery edges everyone fights over. If you’re new to this, start simple – you’ll be hooked.
Gathering Your Ingredients: Keep It Real and Fresh
Let’s talk shopping list. I always grab fresh garlic because pre-minced stuff just doesn’t pack the same punch – trust me, I’ve side-by-side tested it. For the base, I swear by canned biscuit dough; it’s a shortcut that doesn’t skimp on flavor. Ever wondered why some recipes use homemade dough? It’s great if you’ve got time, but for busy nights, this hack keeps things effortless.
Here’s what you’ll need for about 24 bites – scale up if you’re feeding a crowd:
- 1 can (16.3 oz) refrigerated buttermilk biscuits (Pillsbury works like a charm; grab it fresh from the fridge section).
- 8 oz mozzarella cheese, cut into 1/2-inch cubes (I use fresh blocks for better melt – pre-shredded has that anti-caking junk that messes with texture).
- 4 tbsp unsalted butter, melted.
- 4 cloves garlic, minced (or more if you’re a garlic fiend like me).
- 1 tsp Italian seasoning (dried oregano, basil, and thyme in one – lazy genius).
- 1/4 tsp red pepper flakes (optional, for that subtle heat).
- 1/4 cup grated Parmesan cheese, for topping.
- Marinara sauce, for dipping (store-bought is fine; I like Rao’s for its herby vibe).
Pro tip: If you’re stocking up, check out this Italian seasoning blend on Amazon – it’s affordable, smells amazing, and lasts forever. I bought mine last year and it’s still going strong for everything from these bites to pasta nights.
Mix the melted butter, minced garlic, Italian seasoning, and red pepper flakes in a bowl. That’s your magic sauce – brush it on, and boom, restaurant-level flavor at home.
Step-by-Step: How I Make Cheesy Garlic Bread Bites Every Time
Alright, let’s get cooking. Preheat your oven to 375°F – I do this first so I’m not rushing later. I’ve messed up timing before and ended up with doughy centers, so don’t skip this. Spray a muffin tin with non-stick spray; nothing worse than wrestling stuck bites out of the pan.
Flatten each biscuit into a 3-inch round. Pop a mozzarella cube in the center and wrap the dough around it, pinching the seams tight. Place them seam-side down in the tin – this keeps the cheese from oozing out too early. Brush generously with that garlic butter mix, then sprinkle Parmesan on top. Bake for 12-15 minutes until golden and bubbly. The smell? It’ll have everyone hovering in the kitchen.
Pull them out and let them cool for 5 minutes – hot cheese is no joke. Serve with warm marinara. Last game night, I made a double batch, and they vanished in minutes. My friend Sarah joked, “These are basically hugs in food form.” Couldn’t agree more.
For a fun twist, try baking them in a cast-iron skillet like some top recipes suggest. Line the bottom with dough balls, pour extra butter over, and bake at 400°F for 15 minutes. It gives a pull-apart style that’s perfect for sharing. Ever tried that? It’s messy, but oh-so-satisfying.
Tips and Tricks from My Kitchen Trials (And a Few Fails)
I’ve burned my share of batches, so listen up – these cheesy garlic bread bites tips will save you headaches. First, use room-temperature butter for melting; cold stuff splatters everywhere. I learned that the hard way during a holiday rush.
- Cheese choice matters: Go for high-moisture mozz for that stringy pull. Low-moisture works too, but it won’t ooze as dramatically. IMO, fresh blocks beat shredded every time.
- Don’t overfill: One cube per bite – greed leads to leaks and sad, empty pockets.
- Boost the garlic: Fresh over powder if you can. Mince it fine to avoid chunks that overpower.
- Make ahead: Assemble and refrigerate up to 4 hours before baking. Just add 2-3 extra minutes in the oven.
- Vegan swap: Use dairy-free cheese and biscuits; I’ve done it for my lactose-intolerant buddy, and it still rocks.
Humor me here: If your bites come out too greasy, blot with a paper towel post-bake. Happened to me once after going heavy on butter – sarcasm alert: “Who knew ‘more butter’ wasn’t always better?” On the flip side, for extra crisp, broil for 1 minute at the end. Watch closely, though – ovens are sneaky.
Storage? Room temp for a day in an airtight container, or freeze baked ones for up to a month. Reheat in the oven, not microwave, to keep that crunch. Top Pinterest pins swear by air-frying for low-oil versions – 370°F for 8 minutes does the trick if you’re cutting calories.
One more: Pair with a simple salad to balance the richness. My go-to is arugula with lemon vinaigrette. Keeps things light without killing the vibe.
Nutrition Breakdown and Why It’s Worth It
Let’s get real about the eats. Each bite packs about 150 calories, 5g protein, 8g fat, and 15g carbs – solid for a snack that satisfies. Garlic brings antioxidants, and cheese delivers calcium. Not health food, but hey, everything in moderation, right?
From what I’ve seen in popular recipes, folks add veggies like spinach inside for a nutrient boost. I tried that once; it was good, but the kids weren’t fans. Stick to classic for purists, experiment for fun. If you’re tracking, use an app like MyFitnessPal – input your tweaks for accuracy.
Worried about sodium? Opt for low-sodium biscuits. These bites fit keto-ish diets if you skip half the dough, but that’s stretching it. Bottom line: They’re indulgent joy, not a diet staple.
Variations to Keep Things Fresh
Bored of plain? Spice it up! For a buffalo twist, mix hot sauce into the butter – game-day essential. Or go sweet-savory with cinnamon butter (don’t knock it till you try). Pinterest’s full of no-oven versions using toaster ovens, ideal for apartments.
I’ve stuffed mine with cheddar for sharpness or feta for tang. Provolone melts smooth too. Ever wondered about dessert bites? Swap savory for Nutella-stuffed – but that’s another story. For parties, make mini sliders by topping with pepperoni pre-bake.
Tools that help: A good garlic press like this one on Amazon saves time and tears. I upgraded last year and never looked back.
Ingredients
Method
- Preheat oven to 375°F and spray a muffin tin with non-stick spray.
- Flatten each biscuit into a 3-inch round. Place a cheese cube in the center, wrap dough around it, and pinch to seal. Place seam-side down in the tin.
- Mix melted butter, garlic, Italian seasoning, and red pepper flakes. Brush over bites, then sprinkle with Parmesan.
- Bake 12-15 minutes until golden. Cool slightly and serve with marinara.
Notes
- Cheese melting tip: Use fresh mozzarella blocks for the best gooey texture; pre-shredded won’t melt as smoothly.
- Make-ahead hack: Assemble up to 4 hours ahead and refrigerate; add 2-3 minutes to bake time.
- Storage advice: Keep leftovers in an airtight container at room temp for 1 day or freeze for 1 month. Reheat in oven for crispness.
- Customization alert: Add pepperoni or veggies inside for variety, but don’t overfill to avoid leaks.
Wrapping It Up: Your Turn to Try
There you have it – my heartfelt take on cheesy garlic bread bites that always delivers. From that first melty bite to the last crumb, they’re pure comfort with a garlicky edge. Next time you’re hosting or just craving a win, give this a whirl. You’ll thank me later – or at least your taste buds will. What’s your twist on these? Drop a comment; I’d love to hear. Happy munching! 🙂