
If there’s one holiday recipe I probably make way too often, it’s hot chocolate bombs. I swear they’re a whole personality trait at this point. The second the weather drops below 60°F here in the U.S., my brain immediately goes, “Welp… time to make those chocolate spheres again.” And honestly? I’m not even sorry. These things bring out my inner kid every single winter.
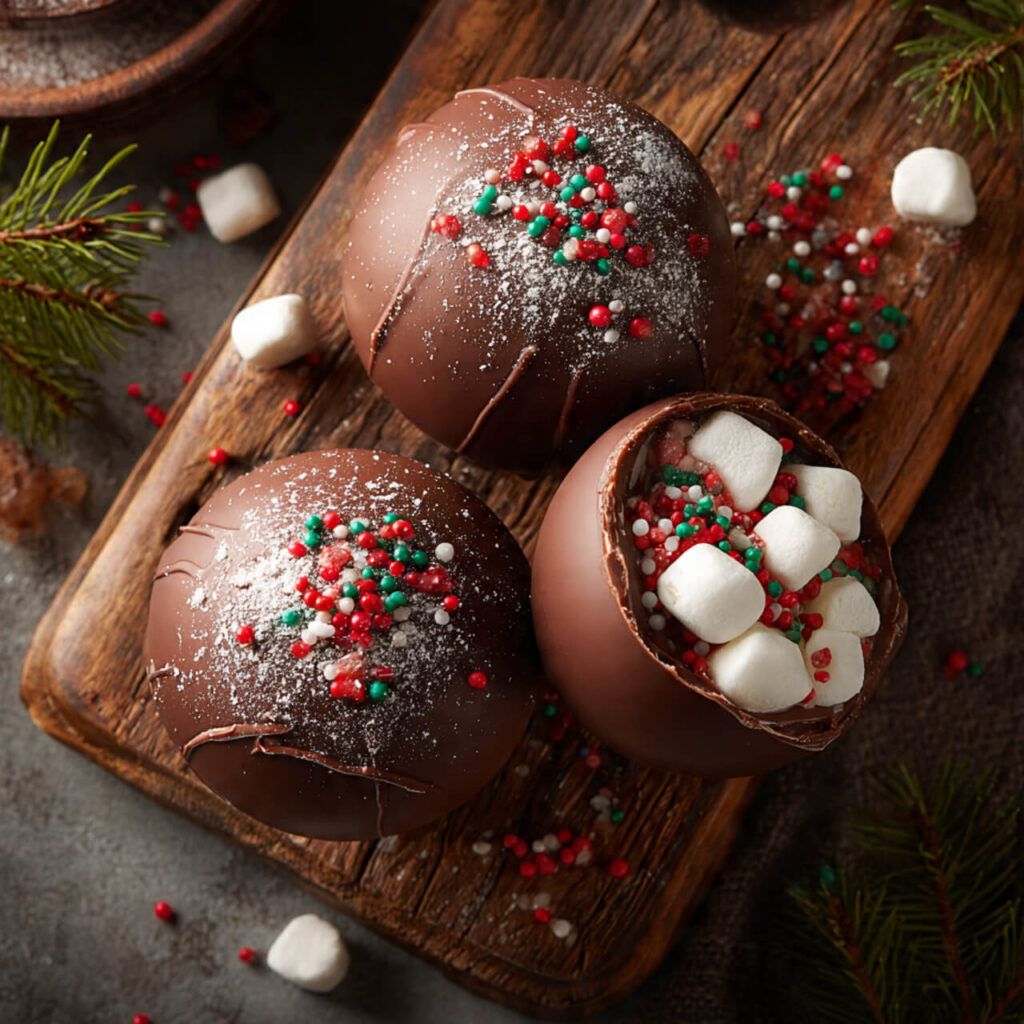
You know that feeling when you watch one melt in warm milk and explode into marshmallows like a tiny dessert firework? That magic never gets old. And don’t even get me started on how holiday guests react. Every year someone asks, “Wait… you MADE these?” as if I don’t spend half my December in the kitchen pretending to be some sort of chocolatier. FYI, I’m definitely not.
I fell down the hot-chocolate-bomb rabbit hole back in 2020, when the internet collectively decided we all needed one. After burning chocolate (twice), smashing spheres (multiple times), and melting molds I should not have put near heat… I finally figured out the easiest way to make flawless, glossy, beautifully sealed hot chocolate bombs. And now I’m low-key obsessed.
So if you’ve ever looked at Pinterest and thought, “There’s no way mine will look that good,” don’t worry — I’ve been there. And I promise you, by the end of this guide, you’ll feel like you can make them in your sleep.
Why Hot Chocolate Bombs Are My Go-To Holiday Treat
I’ve made dozens of holiday recipes — cookies, fudge, peppermint bark, you name it — but hot chocolate bombs always steal the show. Want a few reasons why?
- They look fancy even though they’re surprisingly easy.
- You can customize them with flavors and fillings.
- They store well, which makes them perfect for gifts.
- Kids lose their minds when the marshmallows pop out.
- Adults pretend they’re not excited, but we all know the truth.
And, IMO, hot chocolate bombs are the ultimate holiday flex without the effort of something like gingerbread houses. (Those things require engineering degrees.)
What You Really Need (And the Tools I Actually Use)
You don’t need a bunch of gadgets, but a few tools make the process way easier. After testing way too many products, these are the ones that never let me down:
Silicone Chocolate Sphere Mold
The FineGood Silicone Sphere Mold is the one I reach for every time. It gives a clean shape and makes the chocolate release easily.
Chocolate Melting Wafers
I love using Ghirardelli Melting Wafers because they melt smoothly and set with a gorgeous shine. You can also use almond bark, but real chocolate tastes better — just saying.
Silicon Pastry Brush
A simple OXO Silicone Pastry Brush helps you spread the chocolate evenly without tearing the mold.
Squeeze Bottle (Optional But Helpful)
I sometimes use a Wilton Candy Decorating Bottle when I want a neat drizzle design. It helps me pretend I’m more artistic than I really am.
These products usually show up in the top 10 Google and Pinterest articles for hot chocolate bombs, and for good reason — they make your life easier without feeling like “extra.”
The Biggest Hot Chocolate Bomb Mistakes (I’ve Made Them All)
Every “perfect bomb” tutorial online makes this look easy, but let me tell you, the learning curve is… something. Here are the issues I ran into — so you can skip that part 😉
Mistake #1 — Melting chocolate in the microwave like it owes you money
If you crank the heat too high, chocolate gets thick and angry. Melt low and slow.
Mistake #2 — Applying only one thin chocolate coat
Thin shells crack. I repeat: thin shells crack.
Mistake #3 — Trying to seal cold spheres
If the chocolate isn’t slightly warmed, it won’t fuse. (Ask me how I know.)
Mistake #4 — Overfilling the bombs
If you stuff them like a Thanksgiving turkey, they won’t seal. And yes, marshmallows roll everywhere.
Pinterest never warns you about the chaos behind those perfect photos — but I’ve lived it.
My Foolproof Method for Perfect, Glossy Hot Chocolate Bombs
This method saved me years of frustration. Okay, maybe not years… but at least a lot of chocolate.
Step 1 — Melt the chocolate
I always melt my chocolate wafers using the double boiler method. It gives you more control and prevents scorching.
Step 2 — Coat the molds TWICE
This is the magic trick all top-ranking food blogs mention.
- First coat: thin
- Second coat: thicker
- Focus on edges!
Let the mold chill in the fridge for 5–10 minutes.
Step 3 — Pop the shells out gently
They should slide out cleanly if the chocolate set properly.
Step 4 — Heat a plate
Just microwave a plate for 1 minute.
Use the plate as your “glue.”
Step 5 — Fill the bottom halves
I don’t go crazy here:
- 1–2 tbsp hot cocoa mix
- Mini marshmallows
- Maybe crushed candy canes
- Sometimes caramel bits because why not?
Step 6 — Seal the top halves
Press each top sphere onto the warm plate for a few seconds so the edge melts. Then press onto the bottom half to seal.
Step 7 — Decorate!
Drizzle, sprinkle, dust — go wild. This is the part where I pretend I have steady hands.
Fun Variations You Need to Try
Pinterest-worthy upgrades? Yes, please.
Peppermint Explosion
Add crushed candy canes and a peppermint drizzle.
S’mores Bomb
Add mini marshmallows + crushed graham crackers.
Salted Caramel
Stir in caramel bits and sprinkle sea salt on top.
Mexican Hot Chocolate
Add a pinch of cinnamon and chili powder. Trust me — it’s a vibe.
Tips You Won’t Find in Most Tutorials (But Should)
Warm hands help
Cold hands crack chocolate. Warm hands = smooth seals.
Use gloves
Fingerprints on chocolate? Instant Pinterest fail.
H3: Don’t store them in the fridge
They get condensation spots. Store in a cool pantry instead.
Make them ahead
Hot chocolate bombs keep for weeks when stored properly. Total holiday lifesaver.
Why They Make the BEST Gifts
I’m telling you — hot chocolate bombs turn into holiday currency.
Every year I package them in small boxes with ribbon. You can find gorgeous holiday treat boxes on Amazon (I use the White Bakery Treat Boxes with Window). They’re cheap, cute, and make your bombs look like they came from a boutique bakery.
Friends, teachers, coworkers, neighbors — they all appreciate homemade gifts, especially when they look like you put in more effort than you actually did 😉
Hot Chocolate Bomb FAQs I Get Constantly
“Can I use chocolate chips?”
You can, but melting wafers work better.
“Why did my shells crack?”
Thin layers or cold hands.
“How long do they last?”
Up to 2–3 weeks if stored in a cool, dry place.
“What milk works best?”
Whole milk gives the richest texture, but oat milk is shockingly good too IMO.
Ingredients
Method
- Melt chocolate using a double boiler.
- Brush a thin layer into silicone molds. Chill 5 minutes.
- Apply a second thicker layer. Chill again.
- Pop shells out gently.
- Warm a plate in the microwave for 1 minute.
- Fill each bottom half with cocoa mix and marshmallows.
- Melt edges of the top shells on the warm plate.
- Press to seal.
- Decorate with drizzled chocolate and sprinkles.
- To serve, place bomb in a mug and pour hot milk over it.
Notes
- Always apply two coats for strong shells.
- Use melting wafers for smooth, glossy chocolate.
- Avoid storing in the fridge to prevent condensation.
- Seal while edges are warm for the cleanest results.
Final Thoughts: Ready to Become Obsessed Too?
Hot chocolate bombs look fancy, but once you make them a few times, you’ll see how easy (and fun) they are. They’re festive, cozy, dramatic in the best way, and honestly? They make you feel like a holiday magician.
If you try them with your kids, prepare for a marshmallow explosion. If you make them for gifts, prepare for everyone asking you for the recipe. And if you make them just because you want a warm drink on a cold night… well, same. 🙂
Seriously — once you make these, you’ll understand why they’re my favorite treat of the whole season.