
You know that crackly, golden loaf sitting in a basket at a little Italian restaurant? The one you tear into before the pasta even arrives?
Yeah. That one.
I used to think only bakeries could pull that off. Then I tried making rustic Italian bread using a no knead method, and honestly… I felt slightly betrayed. Why had nobody told me it was this simple?
No stand mixer.
No kneading marathon.
No fancy shaping skills.
Just flour, yeast, water, salt — and time.
If you’ve searched for no knead Italian bread recipe, easy crusty artisan bread, or homemade rustic bread with crispy crust, this is the one I come back to every single time.
Let’s make bread that smells like you own a bakery — without actually owning a bakery.
Why No Knead Bread Works (Even If You’ve Never Baked Before)
I used to overthink bread.
I thought kneading built structure. I thought folding mattered every five minutes. I thought I needed upper body strength.
Then I learned something simple: time replaces kneading.
When you let dough rest for 12–18 hours, gluten develops naturally. The yeast works slowly. Flavor deepens. Structure forms.
You do less. The dough does more.
Ever notice how the best breads taste slightly tangy and complex? Long fermentation creates that flavor.
And honestly? I love recipes that work while I sleep.
The Simple Ingredient List (And Why Each One Matters)
You only need four ingredients.
- 3 cups bread flour
- 1 ½ teaspoons salt
- ½ teaspoon instant yeast
- 1 ½ cups warm water
That’s it.
But let’s break this down.
Why Bread Flour Works Best
Bread flour has higher protein. Higher protein means stronger gluten. Stronger gluten means chewy interior and better rise.
I use:
King Arthur Bread Flour (5 lb bag)
https://amzn.to/4axwpIO
It gives consistent results. Every. Single. Time.
You can use all-purpose flour, but the texture won’t feel quite as rustic.
Instant Yeast vs Active Dry Yeast
Use instant yeast. It blends directly into flour. No blooming needed.
I keep this in my fridge:
SAF Instant Yeast, 1 Pound Pouch
https://amzn.to/3Ms4a5f
It lasts forever and performs reliably.
If you only have active dry yeast, dissolve it in warm water first.
Step-by-Step: How I Make Rustic Italian No Knead Bread
Step 1: Mix the Dough
In a large bowl, combine flour, salt, and yeast.
Add warm water.
Stir with a wooden spoon until shaggy and sticky.
It will look messy. That’s correct. Don’t fix it.
Step 2: Let It Rest (The Magic Happens Here)
Cover the bowl with plastic wrap or a clean towel.
Let it sit at room temperature for 12–18 hours.
Yes, that long.
When ready, the dough will look bubbly and slightly collapsed on top.
That’s perfect.
Ever opened the bowl and thought, “Is this supposed to look like that?” It is.
Step 3: Shape Gently
Flour your counter generously.
Turn the dough out carefully. It will feel sticky.
Fold it over itself 2–3 times. That’s it.
Shape into a rough ball.
No perfection needed. Rustic means imperfect.
Step 4: Second Rise
Place dough on parchment paper.
Cover loosely and let it rise for 30–60 minutes.
Meanwhile, preheat your oven to 450°F.
Put your Dutch oven inside while preheating.
Why You Need a Dutch Oven
A Dutch oven traps steam.
Steam creates:
- Crispy crust
- Better oven spring
- That bakery-style crackle
I use:
Lodge 6-Quart Enameled Cast Iron Dutch Oven
https://amzn.to/4c7X1kV
It holds heat beautifully and costs way less than premium brands.
You don’t need expensive. You need heavy and reliable.
Step 5: Bake Covered, Then Uncovered
Carefully place dough (with parchment) into hot Dutch oven.
Cover with lid.
Bake 30 minutes covered.
Remove lid and bake 10–15 minutes uncovered until golden brown.
Internal temperature should reach about 200°F.
Tap the bottom. It should sound hollow.
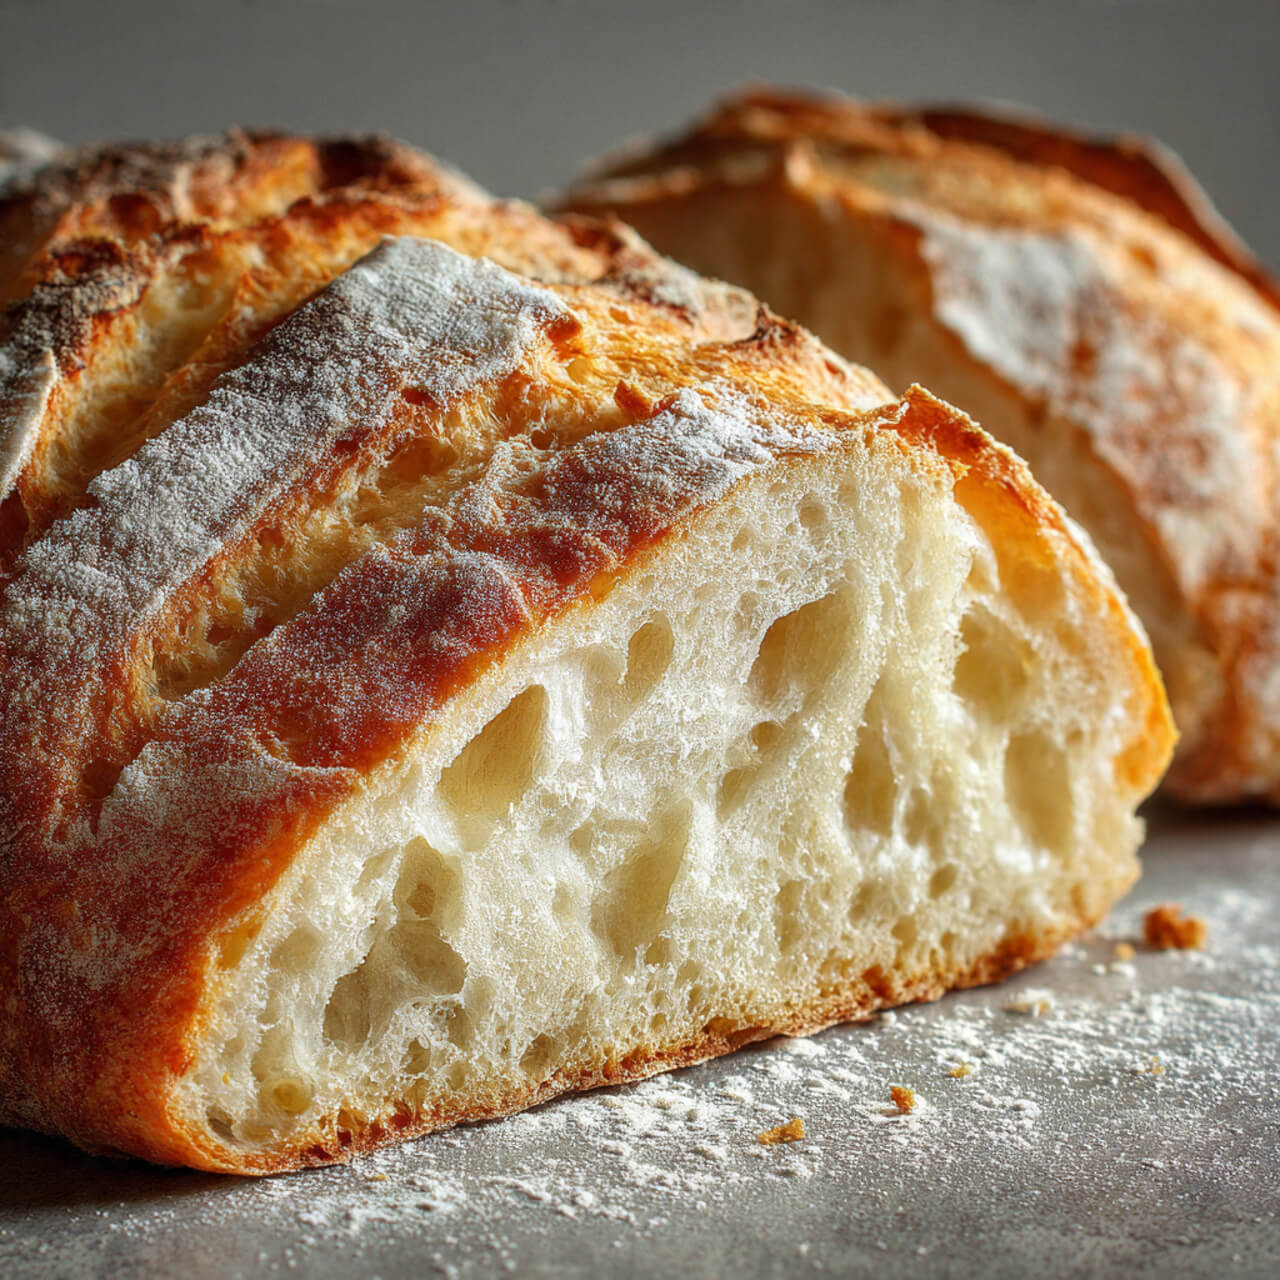
What Makes This Bread “Rustic Italian”?
Rustic Italian bread typically features:
- Thick, crispy crust
- Open crumb with air pockets
- Chewy interior
- Simple ingredients
- No sugar
It’s not soft sandwich bread.
It’s tear-and-dip bread.
It begs for olive oil and balsamic vinegar.
Pro Tips for Perfect Crusty Artisan Bread
1. Don’t Rush Fermentation
Long rest equals better flavor.
Shortcuts equal bland bread.
2. Use High Heat
High heat gives oven spring.
Low heat gives dense loaf.
3. Score the Top (Optional But Helpful)
Use a sharp knife or bread lame.
A simple slash controls expansion.
Common Mistakes That Ruin No Knead Bread
Let’s save you some disappointment.
❌ Too much flour while shaping
❌ Skipping Dutch oven preheat
❌ Cutting bread immediately
❌ Underbaking
Let the loaf cool at least 30 minutes before slicing.
Hot bread slices gummy.
I know. Waiting feels impossible. 🙂
Ways I Love Serving Rustic Italian Bread
- With olive oil and flaky salt
- Alongside pasta
- As bruschetta base
- With burrata and tomatoes
- For grilled cheese
I once used leftovers for garlic bread the next day. Unreal.
How to Store It
Store at room temperature wrapped loosely in paper or cloth.
Avoid airtight plastic unless you want soft crust.
Eat within 2–3 days.
Freeze sliced bread for up to 2 months.
Can You Add Flavor Variations?
Absolutely.
Try adding:
- Rosemary
- Roasted garlic
- Olives
- Cracked black pepper
Fold additions in gently after first rise.
Keep quantities moderate so dough structure stays strong.
Why This Recipe Beats Store-Bought Bread
Store bread often contains:
- Preservatives
- Sugar
- Dough conditioners
This loaf contains four ingredients.
You control everything.
And honestly? Nothing beats fresh bread smell filling your kitchen.
It feels oddly empowering.
Ingredients
Method
- Mix flour, salt, and yeast in bowl.
- Add warm water and stir until shaggy dough forms.
- Cover and let rest 12–18 hours.
- Turn onto floured surface and fold gently.
- Shape into ball and rest 30–60 minutes.
- Preheat oven to 450°F with Dutch oven inside.
- Bake 30 minutes covered, 10–15 minutes uncovered.
- Cool 30 minutes before slicing.
Notes
- Use bread flour for best chew.
- Preheat Dutch oven fully.
- Do not rush long fermentation.
- Let bread cool before cutting.