
I’ll be totally honest with you — I’m not above showing off in the dessert department. When I invite friends over, I like that moment when someone takes a bite and goes, “Wait… YOU made this?” And I just pretend I slaved away for hours when, in reality, I mixed three things in a bowl and called it a day. 🙂
That’s basically why this 3-Ingredient Chocolate Mousse has become my secret weapon. I’ve made it for birthdays, random Tuesdays, and one extremely dramatic breakup (long story, but yes, chocolate helped). The crazy part? People ALWAYS think it’s some complicated French recipe. Meanwhile, I’m in the kitchen whisking like a gremlin and laughing to myself because it takes almost no effort.
So if you’re here looking for a dessert that’s rich, silky, ridiculously easy, and looks like something you’d order at a fancy restaurant even though it took you, what, ten minutes? You’re my people. Let’s talk chocolate mousse — the lazy overachiever’s dessert.
Why Everyone Loves This Chocolate Mousse (Including Me)
You know how some simple desserts taste… simple? Not this one. This mousse gives luxury vibes without luxury effort. Ever wondered why it turns out so creamy even without eggs or gelatin? It’s all about how the ingredients work together.
Here’s what makes it magic:
- Whipped cream gives the mousse its airy, cloud-like texture
- Pure chocolate gives richness without artificial flavor
- A bit of sugar (or sweetener) balances bitterness and boosts flavor
And that’s it. Three ingredients. No weird stabilizers. Nothing terrifying.
Ingredients You Need (and Why They Matter)
Here’s the thing — with only three ingredients, each one matters a lot. I learned this the hard way after using cheap chocolate once. Never again.
1. Heavy Whipping Cream
This is the base. You want cold heavy cream because it whips better. I use the carton from Costco or Horizon Organic Heavy Cream. Whip it until soft peaks form — not stiff peaks unless you enjoy mousse that feels like frosting.
2. Dark or Semi-Sweet Chocolate
The chocolate MAKES the mousse. I’ve tried everything:
- Ghirardelli Semi-Sweet Baking Chocolate
- Lindt 70% Dark Chocolate Bars
- Guittard Baking Wafers
- Callebaut Belgian Dark Chocolate
My go-to? Ghirardelli — it melts beautifully and tastes fancy without costing a fortune.
3. Sugar (Optional but Recommended)
Use granulated sugar, powdered sugar, or even maple syrup. If your chocolate is already sweet enough, you can skip this.
Amazon Products I Actually Use
I mention these because I genuinely use them:
- Ghirardelli Semi-Sweet Baking Chocolate
- Lindt 70% Dark Chocolate Bars
- KitchenAid Hand Mixer
- Pyrex Glass Bowls Set
- OXO Silicone Spatula
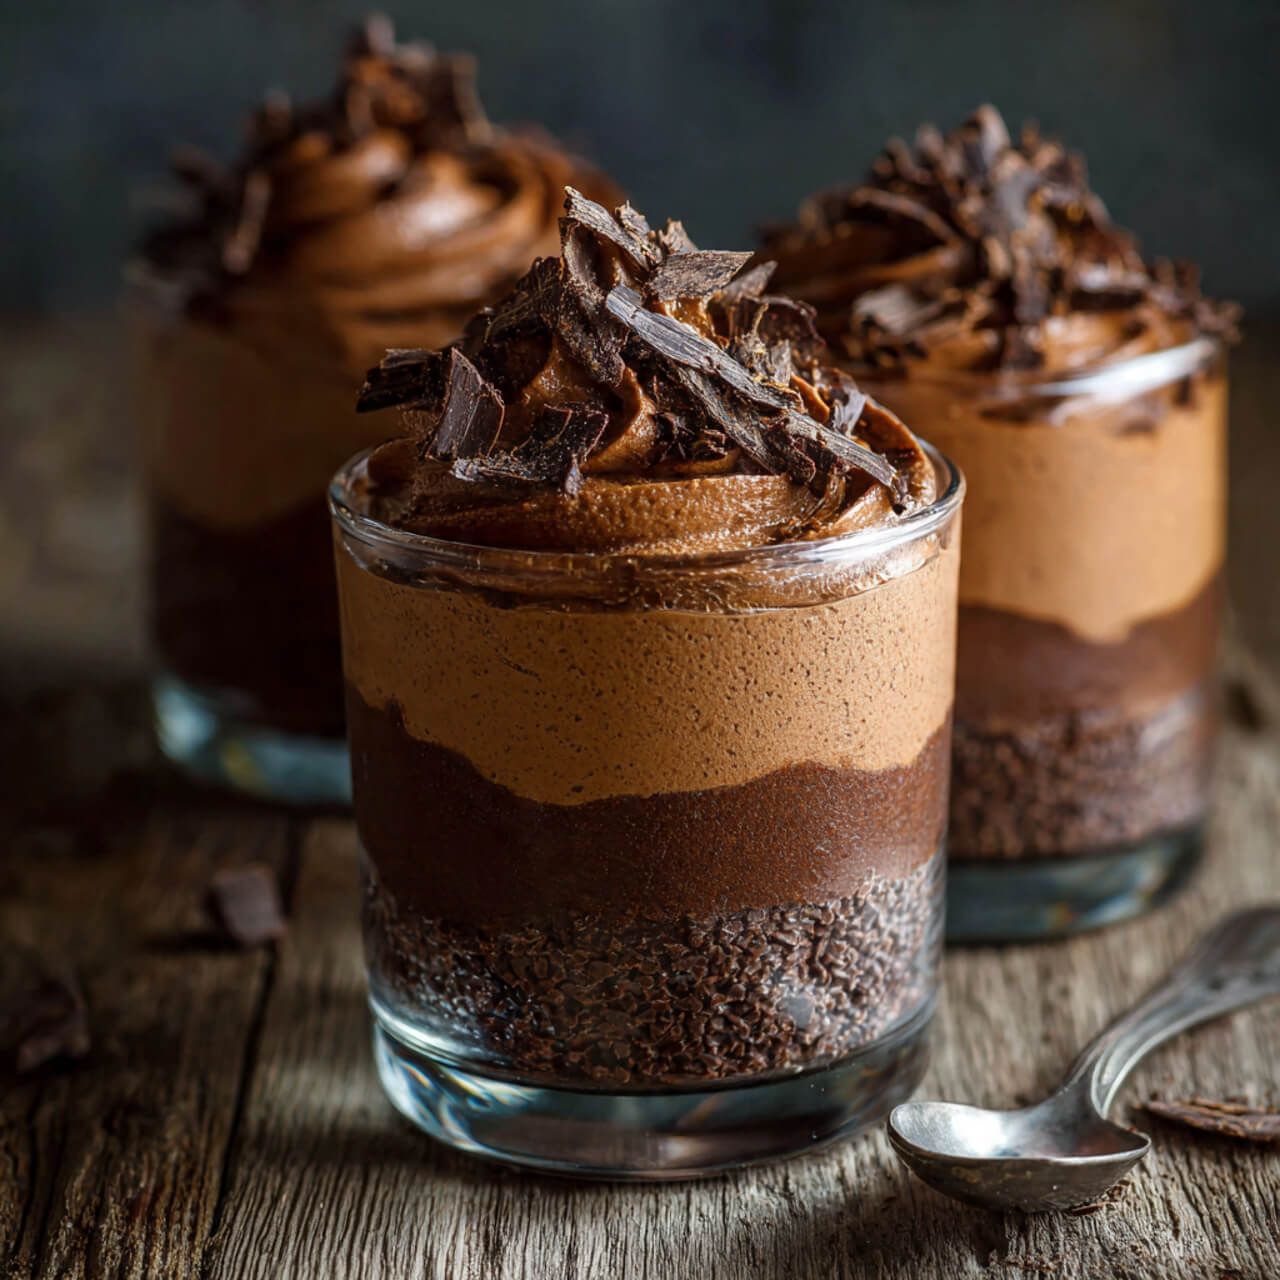
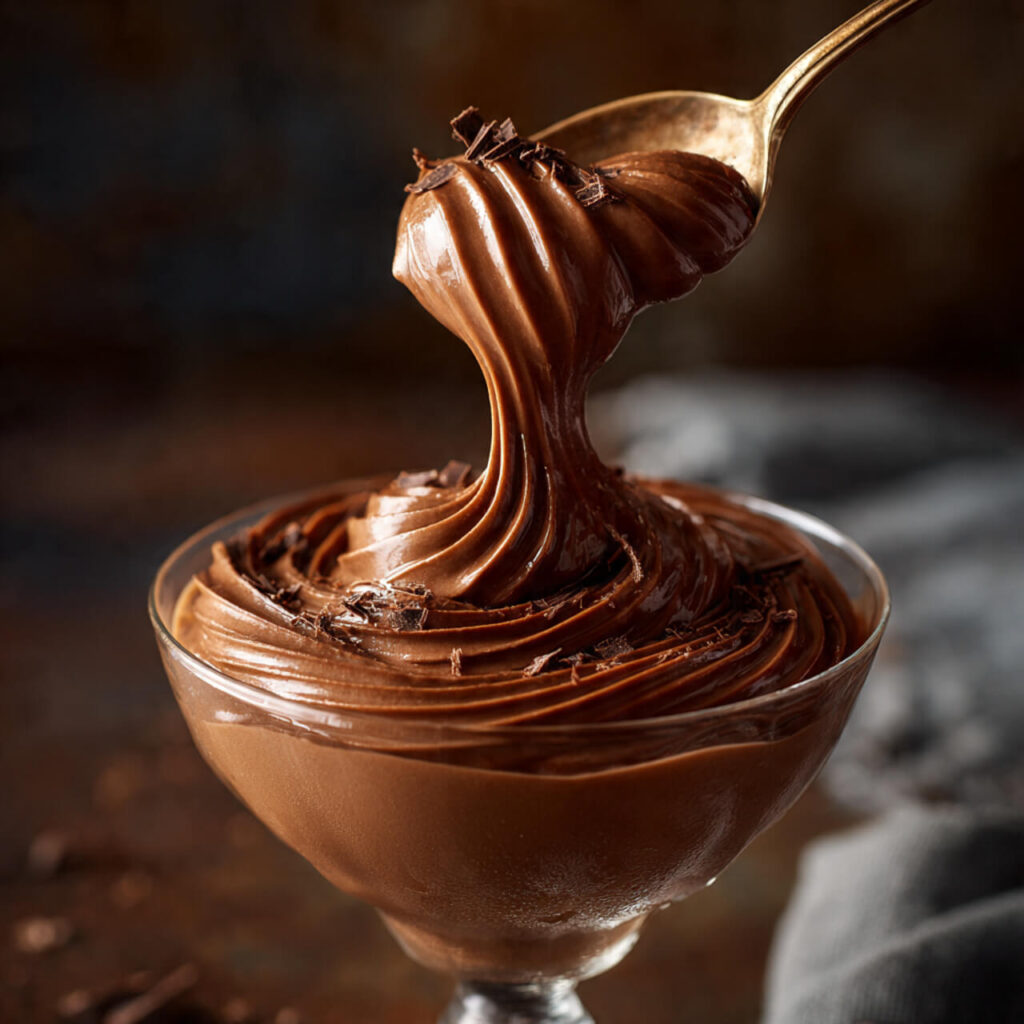
- Anchor Hocking Dessert Glasses (for serving — looks fancy AF)
How I Make My 3-Ingredient Chocolate Mousse (My Chaos-Free Method)
I swear, this recipe is so forgiving that even if you’re half-distracted watching TikTok, it still turns out perfect. Here’s my exact process:
Step 1 — Chill Your Mixing Bowl
This step sounds extra, but trust me, it helps. I toss my metal bowl in the freezer for 10 minutes. Cold bowl + cold cream = faster whipping.
Step 2 — Melt the Chocolate
I break the chocolate into pieces and melt it two ways depending on my mood:
Microwave method (lazy mode)
- Microwave for 30 seconds
- Stir
- Microwave again for 15 seconds
- Repeat until smooth
Double-boiler method (fancy mode)
Safer, but slower. Place a bowl over simmering water and stir.
Once melted, let it cool for a minute (hot chocolate + cold cream = chocolate scrambled eggs — please don’t).
Step 3 — Whip the Cream
I grab my KitchenAid Hand Mixer and whip the heavy cream until soft peaks form.
Add sugar here if you like it sweeter.
You want it thick but still able to fold into the chocolate.
Step 4 — Fold the Chocolate In
This is the part where you pretend you’re on a cooking show.
Pour the melted chocolate into the whipped cream in two parts.
Use an OXO Silicone Spatula and scrape gently.
You don’t want to stir aggressively unless you like mousse that’s sad and deflated.
Step 5 — Chill and Serve
I spoon it into Anchor Hocking Dessert Glasses because they make everything look fancier.
Chill for at least 1 hour.
Overnight? Even better.
Tips, Tricks, and All the Stuff I Wish Someone Told Me Earlier
Here’s where I share my mousse wisdom — stuff that’s not obvious but makes a huge difference.
⭐ Use room-temperature chocolate for blending
Hot chocolate melts the cream. Cold chocolate seizes.
Warm is perfect.
⭐ Don’t over-whip the cream
You want mousse, not butter. Been there… not proud.
⭐ Add flavor boosts
Try these if you want to level up:
- Espresso powder (my fav!)
- Vanilla extract
- Orange zest
- Raspberry puree
- A splash of Baileys (don’t judge me — it’s amazing)
⭐ Use high-quality chocolate
Cheap chocolate = waxy mousse
Good chocolate = silky mousse
⭐ Make it ahead
This mousse tastes even better the next day, IMO.
⭐ Serve creatively
Some ideas that always get “ooooh” reactions:
- Layer with berries
- Top with shaved chocolate
- Add whipped cream
- Serve in mini glasses for parties
Ingredients
Method
- Chill a mixing bowl in the freezer for 10 minutes.
- Melt chocolate in the microwave or over a double boiler. Let cool slightly.
- Whip the cream until soft peaks form.
- Add sugar and whip lightly.
- Fold melted chocolate into the whipped cream gently.
- Spoon into serving glasses and refrigerate for 1 hour before serving.
Notes
- Use good-quality chocolate for best flavor.
- Do not over-whip the cream or the texture becomes grainy.
- Add a splash of vanilla for extra depth.
- Chill the mousse well for the creamiest results.