
Let me be honest right out of the gate: I did not grow up loving cauliflower. I tolerated it. Barely. It felt like the vegetable equivalent of cardboard—fine if smothered in cheese, otherwise kind of pointless. Then I bought an air fryer on a random sale day, tossed in some cauliflower out of curiosity, and… yeah. Everything changed.
Now I make air fryer cauliflower at least once a week. Sometimes twice. Sometimes three times when I pretend it’s “meal prep” but really I just keep snacking. If you’ve ever wanted cauliflower that’s crispy on the outside, tender on the inside, and actually exciting to eat, you’re in the right kitchen.
Pull up a stool. I’ll show you exactly how I make it, what actually matters, what doesn’t, and how to avoid the soggy sadness I endured early on.
Why the Air Fryer and Cauliflower Are a Perfect Match
Cauliflower needs heat. Real heat. Not that lukewarm oven situation where it roasts unevenly and dries out before browning.
The air fryer solves that fast.
Here’s why I stick with it:
- High, circulating heat creates crisp edges
- Minimal oil still delivers big flavor
- Quick cook time (under 20 minutes, always)
- Versatility—snack, side, or main
Ever notice how cauliflower absorbs flavor like a sponge? The air fryer locks it in instead of steaming it away. That’s the magic.
The Air Fryer I Trust (Because Size and Power Matter)
I’ve tested a few air fryers over the years, and yeah—some are just better for vegetables.
I currently use the Ninja AF101 Air Fryer (4-Quart), and I recommend it constantly.
Why?
- It heats aggressively (great for browning)
- The basket fits a full head of cauliflower
- It doesn’t leave weird raw spots
IMO, airflow and basket space matter way more than fancy buttons.
Choosing the Right Cauliflower (Small Details, Big Difference)
I used to grab whatever cauliflower looked “fine.” That worked… sometimes. Now I pay attention.
What I Look For
- Creamy white florets, no brown spots
- Firm and heavy for its size
- Tight clusters, not crumbly
Loose florets dry out fast. Ask me how I know :/

Ingredients I Use Every Time (Simple on Purpose)
This recipe stays basic because cauliflower shines with the right technique.
Core Ingredients
- 1 large head cauliflower
- 1½ tablespoons olive oil
- ½ teaspoon kosher salt
- ½ teaspoon smoked paprika
- ½ teaspoon garlic powder
- ¼ teaspoon black pepper
Optional Extras (Mood-Dependent)
- Parmesan cheese
- Buffalo sauce
- Nutritional yeast
- Lemon zest
Some days I keep it clean. Other days I drown it in sauce. Balance.
Step-by-Step: How I Make Perfect Air Fryer Cauliflower
Step 1: Cut It Right
I cut the cauliflower into even-sized florets, about 1½ inches each. Uniform size cooks evenly. Random chunks cause chaos.
I rinse them quickly and dry them thoroughly. Dry = crispy. Wet = regret.
Step 2: Season Like You Care
I toss the florets in a large bowl with olive oil and all the spices.
I use my hands. Spoons miss spots. Hands don’t.
Step 3: Preheat the Air Fryer
I preheat to 380°F for about 3 minutes.
Skipping this step gives you pale cauliflower. I learned that the boring way.
Step 4: Cook in Batches if Needed
I spread the cauliflower in a single layer.
- Cook at 380°F for 14–18 minutes
- Shake the basket every 5 minutes
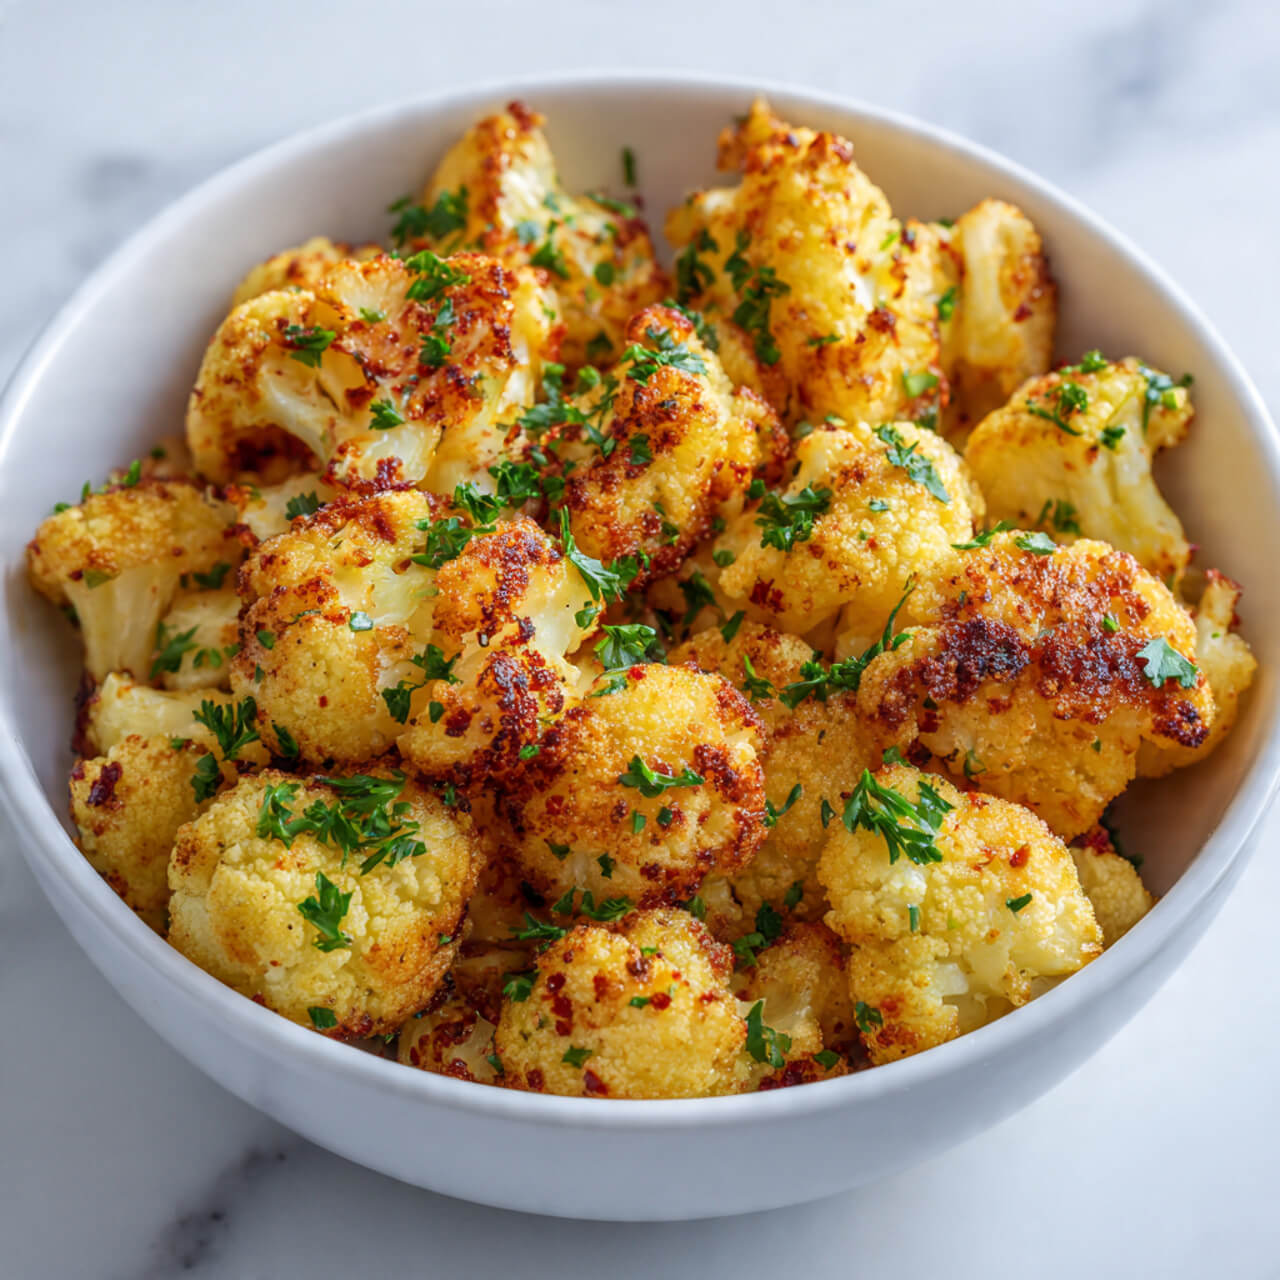
By minute 14, I check. I want deep golden edges and slight charring.
Step 5: Finish Strong
Right after cooking, I:
- Add Parmesan or sauce
- Toss quickly
- Taste and adjust salt
Hot cauliflower absorbs seasoning better. That’s not opinion—that’s experience.
Mistakes I Made So You Don’t Have To
Let’s save you some disappointment.
Avoid These
- Overcrowding the basket (steam city)
- Using too little oil (no browning)
- Low heat cooking (sad texture)
- Skipping mid-shakes (uneven color)
Ever wondered why your cauliflower tastes fine but feels wrong? It’s usually one of these.
My Favorite Flavor Variations (Tested and Loved)
Once you master the base, things get fun.
Buffalo-Style Cauliflower
- Toss cooked florets in warm buffalo sauce
- Air fry 2 more minutes
- Finish with ranch or blue cheese
Parmesan Garlic
- Add grated Parmesan right after cooking
- Sprinkle garlic powder and parsley
Vegan “Cheesy”
- Use nutritional yeast + olive oil
- Add lemon zest
FYI, nutritional yeast works shockingly well here.
Oil Choice Actually Matters (I Learned This Late)
Cheap oil can taste flat or bitter at high heat.
I use California Olive Ranch Everyday Olive Oil because:
- It handles air fryer temps
- It tastes clean
- It doesn’t smoke
You don’t need much. Just the right kind.
Is Air Fryer Cauliflower Healthy? Yes, and Satisfying
This isn’t diet punishment food.
Why It Works
- High in fiber
- Naturally low-carb
- Uses less oil than frying
- Keeps nutrients intact
I feel full after eating it. That’s rare for vegetables.
How I Serve It (Beyond a Side Dish)
I don’t just plop this next to chicken anymore.
My Go-To Uses
- Taco filling
- Salad topper
- Snack with dipping sauce
- Grain bowl base
Leftovers reheat well too. Five minutes back in the air fryer and boom—crispy again.
Ingredients
Method
- Preheat air fryer to 380°F.
- Toss cauliflower with oil and seasonings.
- Arrange florets in a single layer.
- Air fry for 14–18 minutes, shaking every 5 minutes.
- Finish with optional toppings and serve hot.
Notes
- Dry cauliflower thoroughly
- Don’t overcrowd the basket
- Shake often for even browning
- Add cheese after cooking