
I love a good chicken cutlet. I grew up eating them fried, crispy, and stacked dangerously high on paper towels. They tasted amazing… and also made my kitchen smell like oil for two days straight. After one too many “why does everything smell like yesterday’s dinner?” moments, I started experimenting with baked Italian chicken cutlets.
I didn’t expect much at first. Baked cutlets sounded like the responsible choice, not the delicious one. But then something clicked. The coating turned golden. The chicken stayed juicy. And suddenly, I wasn’t missing the frying pan at all. Ever had a recipe surprise you like that?
Why Baked Italian Chicken Cutlets Just Make Sense
Let’s be real. Most of us want comfort food without the cleanup or regret. These cutlets hit that sweet spot.
Here’s why I make them constantly:
- Crispy without frying
- Lighter but still satisfying
- Perfect for weeknights
- Great for meal prep and leftovers
IMO, this is one of those recipes that earns its spot in your rotation fast.
The Italian Flavors That Actually Matter
Italian chicken cutlets don’t need a mile-long ingredient list. They just need the right ones.
Breadcrumbs: Go Italian-Style
I always use Italian seasoned breadcrumbs. They already include herbs like oregano and parsley, which saves time and adds flavor.
If you want extra crunch (and I usually do), mix in a little panko. That combo gives the best texture.
Parmesan Cheese: Freshly Grated Wins
Pre-shredded Parmesan works, but freshly grated melts better and tastes sharper. I learned that the hard way.
Olive Oil Spray (Yes, Spray)
A light spray helps the cutlets brown evenly. Drizzling oil sounds nice, but spray gives control and prevents soggy spots.
My Favorite Tools for This Recipe (Tested, Not Sponsored)
I don’t recommend tools unless I use them myself. These make life easier:
- Nordic Ware Natural Aluminum Baking Sheet
Even browning, no warping, easy cleanup.
👉 https://amzn.to/3YXHhJr - Meat Pounder
Makes pounding chicken weirdly satisfying.
👉 https://amzn.to/4bMH6bh - Microplane Classic Zester/Grater
Perfect for Parmesan and lemon zest.
👉 https://amzn.to/3LXMJZT
I’ve abused all three. They’ve survived.
How I Prep the Chicken (This Step Changes Everything)
I butterfly the chicken breasts first, then pound them to even thickness. Thin chicken cooks evenly and stays tender. Thick pieces dry out. Simple math.
I season the chicken lightly before breading. That way, flavor hits every layer.
The Breading Setup I Swear By
Step 1: Flour
Just a light dusting. This helps everything stick.
Step 2: Eggs
Whisked with a splash of milk. Nothing fancy.
Step 3: Breadcrumb Mixture
This is where the flavor lives:
- Italian breadcrumbs
- Panko
- Grated Parmesan
- Garlic powder
- Black pepper
- A pinch of salt
Ever wondered why restaurant cutlets taste better? Seasoned crumbs. That’s the secret.
Baking vs Frying: My Honest Take
I’ve done both. A lot.
Frying gives instant gratification but also:
- More cleanup
- More oil
- More smell
Baking gives:
- Crisp edges
- Juicy center
- Hands-off cooking
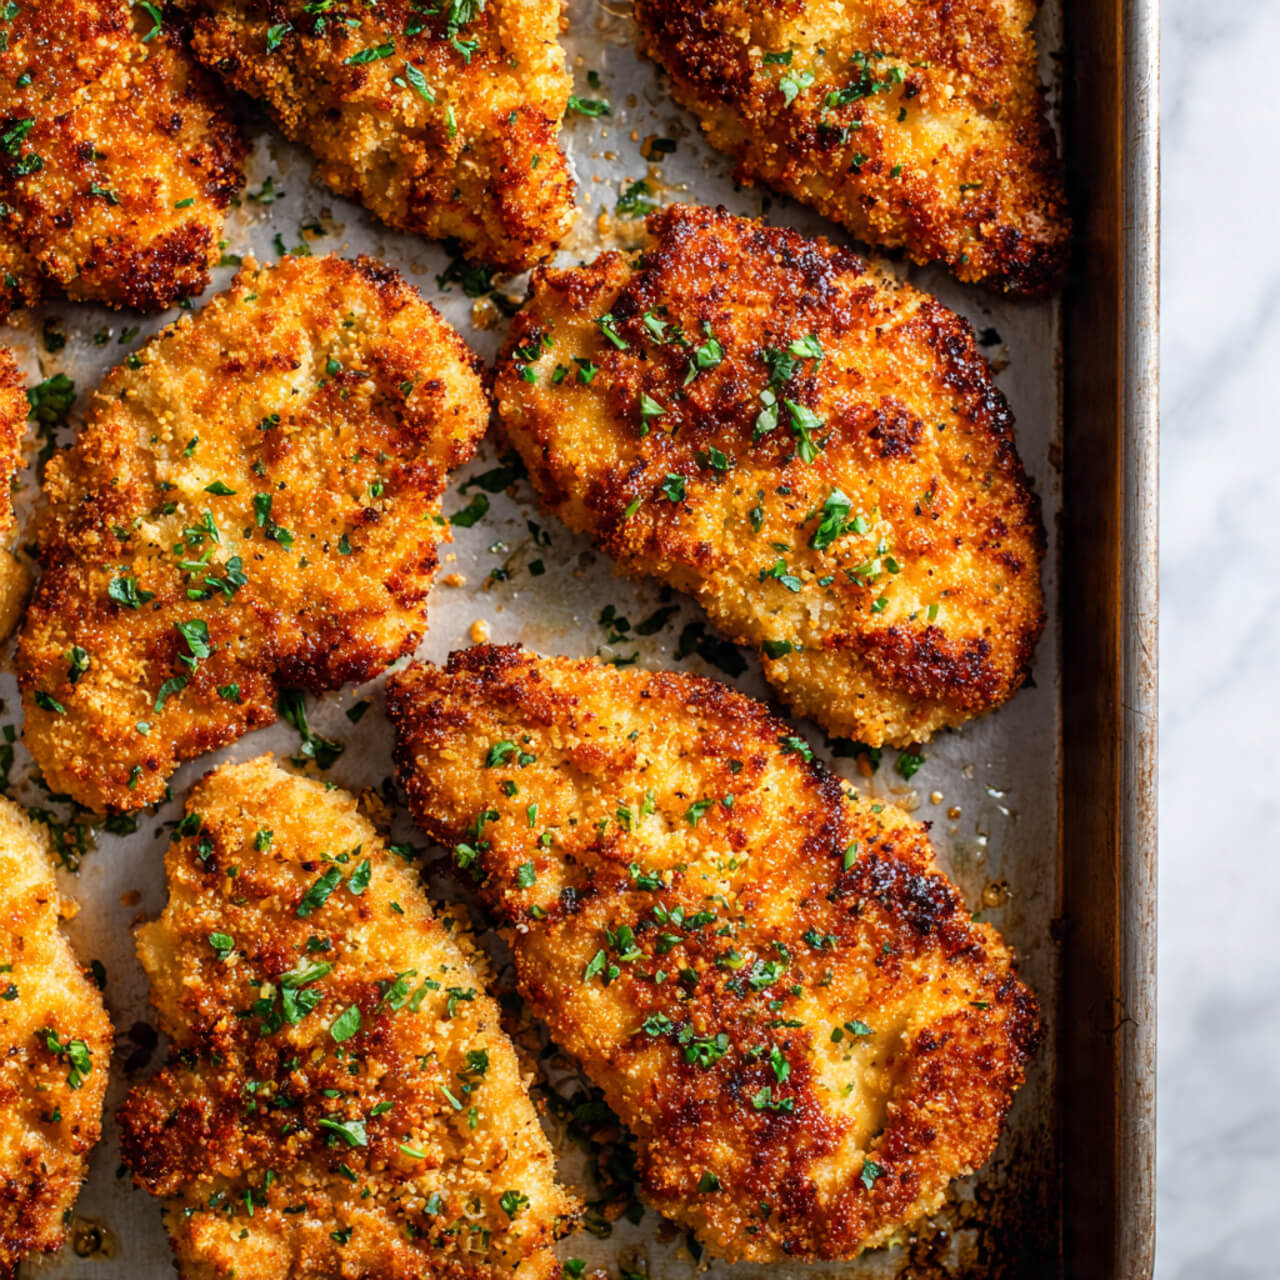
When I bake at 425°F, the cutlets come out golden and crunchy. No babysitting required. Win.
Step-by-Step: How I Make Baked Italian Chicken Cutlets
Step 1: Preheat and Prep
I preheat the oven to 425°F and line a baking sheet with parchment.
Step 2: Bread the Chicken
I coat each piece in flour, dip it in egg, then press it into the breadcrumb mix. I really press — commitment matters here.
Step 3: Arrange and Spray
I place the cutlets on the pan with space between them and spray the tops lightly with olive oil.
Step 4: Bake and Flip
I bake for 12 minutes, flip, spray again, then bake another 10–12 minutes until golden and cooked through.
The smell at this point? Dangerous 🙂
Tips I Learned After Making These Too Many Times
Experience teaches things recipes don’t always mention.
- Flip halfway for even browning
- Don’t overcrowd the pan
- Use a wire rack if you want extra crispiness
- Let them rest for 5 minutes before serving
Skipping these won’t ruin the dish, but following them makes it better.
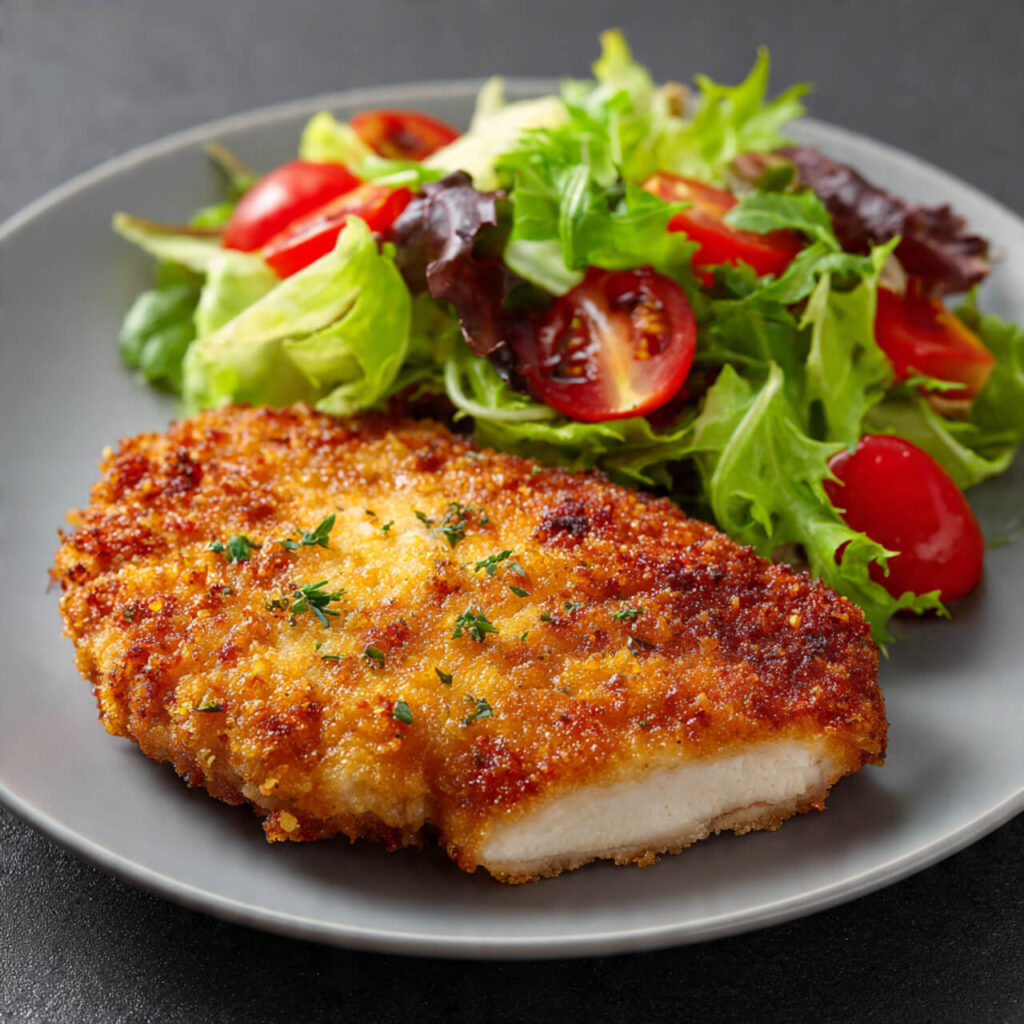
How I Serve These Cutlets
These cutlets play well with others.
My go-to pairings:
- Over spaghetti with marinara
- On a toasted Italian roll for sandwiches
- With roasted veggies for lighter meals
- Sliced on salads for leftovers
Ever noticed how some recipes feel stuck in one role? These don’t.
Storing and Reheating (Because Leftovers Matter)
I store leftovers in an airtight container for up to 3 days.
To reheat:
- Oven at 375°F for 10 minutes
- Air fryer at 350°F for 5 minutes
Microwaves work… but you’ll lose the crunch :/
Why This Recipe Keeps Getting Saved
This recipe hits all the right notes:
- Classic Italian flavor
- Modern, lighter method
- Reliable results
- Flexible serving options
It’s comforting without being heavy and easy without being boring. That balance keeps people coming back.
Ingredients
Method
- Preheat oven to 425°F and line a baking sheet with parchment.
- Set up three bowls: flour, eggs with milk, and breadcrumb mixture.
- Season chicken lightly with salt and pepper.
- Dredge chicken in flour, dip in egg, then coat in breadcrumbs.
- Place on baking sheet and spray lightly with olive oil.
- Bake 12 minutes, flip, spray again, and bake another 10–12 minutes.
- Rest 5 minutes before serving.
Notes
- Pound chicken evenly for best texture
- Use olive oil spray, not heavy drizzles
- Flip halfway for even crispiness
- Reheat in oven or air fryer for best leftovers
Final Thoughts (From Someone Who Really Loves Cutlets)
If you want crispy, flavorful chicken without frying oil splatter, baked Italian chicken cutlets belong in your kitchen. I make them when I want comfort, speed, and leftovers that still taste good the next day.
Try them once, and I promise — they’ll quietly become a staple.