
Let me tell you exactly how this recipe entered my life. I wanted chips. I didn’t need chips, but I wanted that crunchy, salty, snacky situation that somehow always shows up around 4:17 PM. The pantry offered chickpeas. I sighed. Then I roasted them with garlic and parmesan… and suddenly I had a problem. A good one.
Because garlic parmesan roasted chickpeas are the kind of snack you start “taste-testing” and accidentally finish the whole pan. Ever done that thing where you stand at the counter pretending you’re just checking seasoning? Yeah. Same.
This recipe has lived in my kitchen for years now. I’ve tweaked it, burned a batch or two (RIP), and learned exactly what turns chickpeas from meh to crispy gold. I’m sharing all of it here—the wins, the mistakes, and the little details that actually matter.
Why Garlic Parmesan Roasted Chickpeas Never Last Long
Chickpeas don’t get enough credit. They’re cheap, versatile, and quietly powerful. When roasted properly, they turn crunchy on the outside, tender inside, and wildly snackable.
Here’s why this version works so well:
- Garlic adds depth, not just flavor
- Parmesan adds umami and crunch
- High heat = crispiness
- Simple ingredients, big payoff
IMO, this combo hits the same satisfaction level as seasoned popcorn or cheese crackers—but with actual nutrition.
What the Best Recipes All Agree On (And They’re Right)
After testing methods and reading dozens of variations, I noticed some consistent themes among the most successful garlic parmesan chickpea recipes:
- Dry the chickpeas really well
- Roast before adding cheese
- Use freshly grated parmesan
- Don’t crowd the pan
- Season in layers
Miss any of those, and the texture suffers. Ever had soggy roasted chickpeas? Tragic.
Let’s Talk Chickpeas (Because Prep Matters)
Canned vs Dried
I almost always use canned chickpeas. They’re convenient and consistent. If you cook dried chickpeas, make sure they’re fully tender—not mushy.
The Most Important Step: Drying
I drain, rinse, and then pat them aggressively dry with a clean towel. Sometimes I even let them air-dry for 10 minutes.
Moisture is the enemy of crispiness. No shortcuts here.
Olive Oil & Seasoning: Keep It Simple but Intentional
I’ve tested fancy oils and bargain ones. A good-quality olive oil makes a difference, especially when flavors are minimal.
I usually reach for California Olive Ranch Extra Virgin Olive Oil because it tastes clean and roasts well.
👉 https://amzn.to/3N6nuoB
My Go-To Seasoning Base
Before roasting:
- Olive oil
- Salt
- Garlic powder (not fresh yet)
Fresh garlic burns at high heat. Powder first. Fresh later.
Parmesan: Fresh or Bust
I know the green can exists. I also know it doesn’t melt or crisp the same way.
For this recipe, freshly grated parmesan matters. It clings better, browns better, and tastes sharper.
A Microplane grater makes quick work of this and turns parmesan into fluffy magic.
👉 https://www.amazon.com/dp/B00004S7V8
Once you use one, you won’t go back.
Step-by-Step: How I Make Garlic Parmesan Roasted Chickpeas
Step 1: Prep the Chickpeas
- Drain and rinse 2 cans of chickpeas
- Pat them completely dry
- Remove loose skins if you feel patient (optional, but helps)
Step 2: First Roast (The Crisping Phase)
I toss the chickpeas with:
- Olive oil
- Salt
- Garlic powder
Then I spread them out on a baking sheet—single layer only.
I roast at 400°F for 25–30 minutes, shaking the pan halfway.
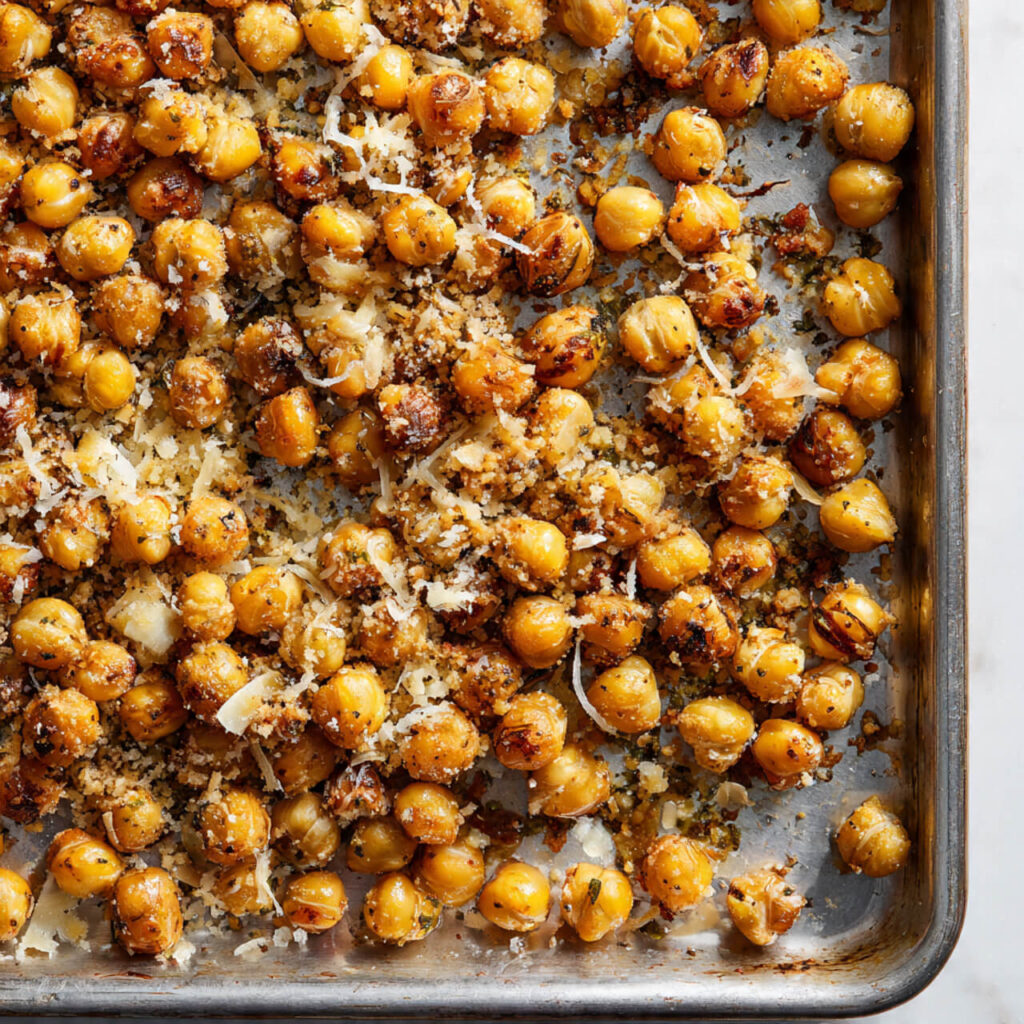
Step 3: Add the Good Stuff
Once the chickpeas look golden and dry, I pull them out and add:
- Freshly grated parmesan
- Minced garlic
- Black pepper
I toss quickly and return them to the oven.
Step 4: Final Roast
I roast another 8–10 minutes until the parmesan melts and crisps.
Your kitchen will smell outrageous. Fair warning.
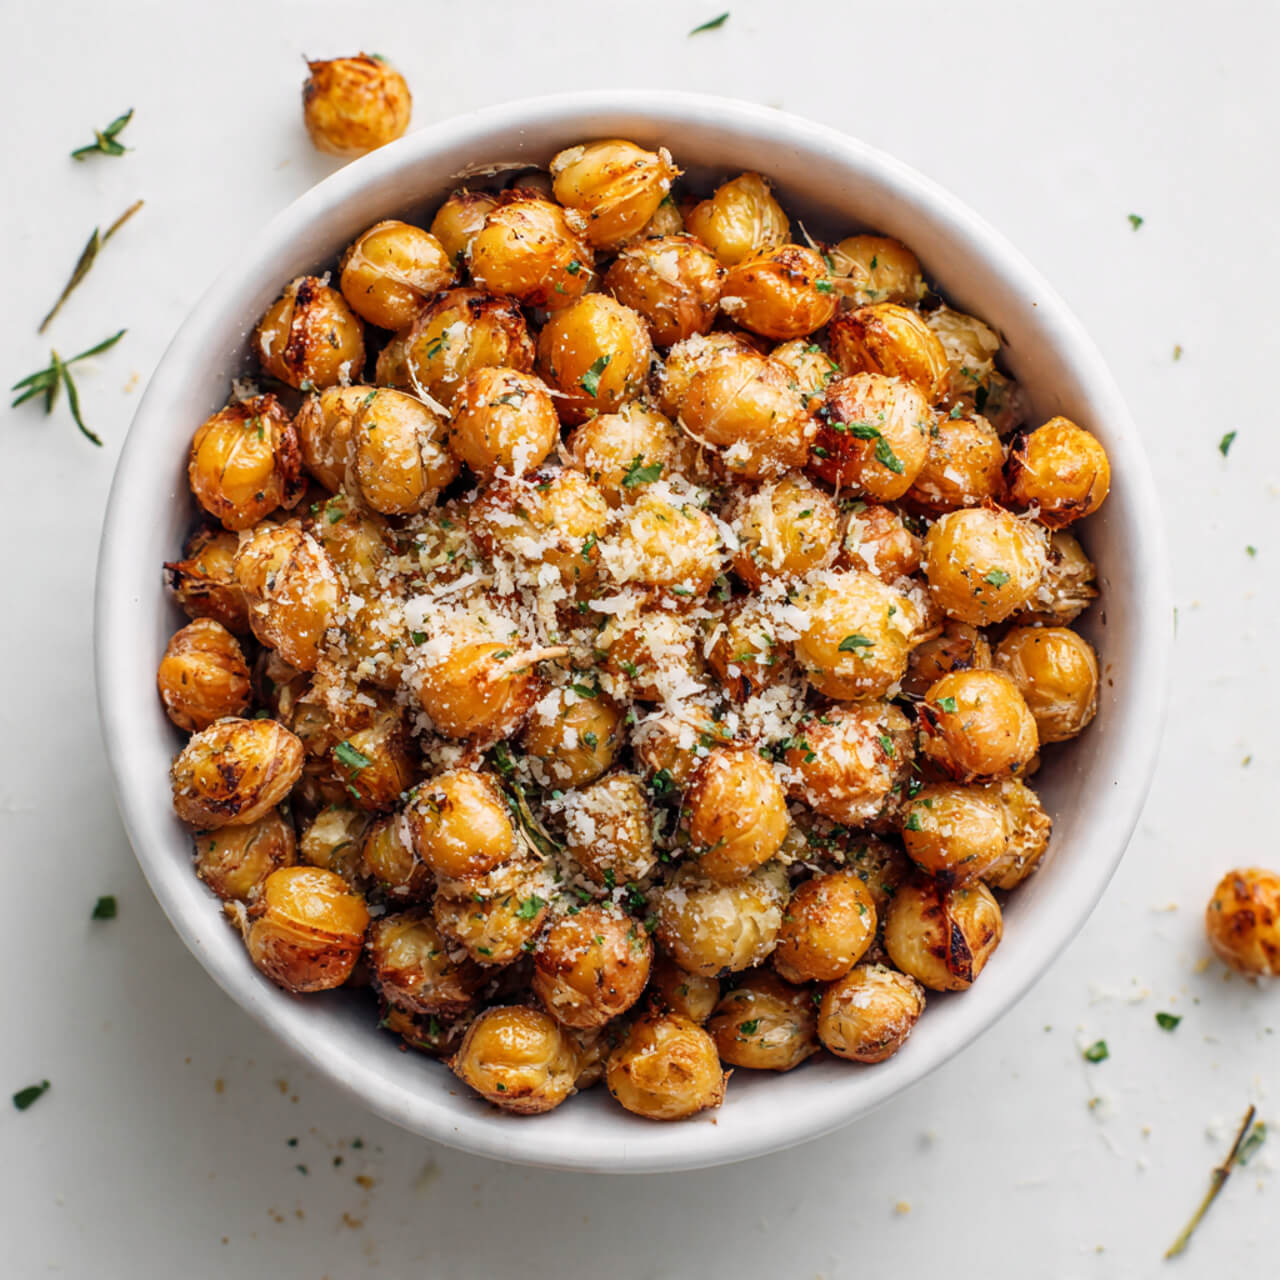
How to Tell When They’re Done
Perfect roasted chickpeas:
- Sound crispy when shaken
- Feel dry to the touch
- Have deep golden spots
If they feel soft, keep roasting. Chickpeas don’t mind patience.
Common Mistakes (I’ve Made All of These)
- Adding parmesan too early
- Crowding the pan
- Using wet chickpeas
- Skipping the shake halfway
- Roasting at low heat
FYI, low heat = chewy chickpeas. Always.
Flavor Variations I Use All the Time
Once you master the base, it’s game over.
Spicy Garlic Parm
Add red pepper flakes or cayenne.
Italian Herb
Add oregano and basil with the parmesan.
Lemon Garlic
Finish with lemon zest after roasting.
Same method. Different mood.
How I Actually Eat These (Beyond Snacking)
These don’t just live in snack bowls.
I use them:
- On salads instead of croutons
- On soups for crunch
- As a party snack
- Straight off the tray (no shame)
They disappear fast no matter where they land.
Storage Tips (Short but Important)
These taste best the day they’re made.
- Room temp: Same day
- Reheat: Oven or air fryer to re-crisp
Don’t seal them airtight while warm. Steam ruins crunch.
Tools That Make This Easier (Optional, Not Fancy)
- Nordic Ware Half Sheet Pan – even roasting, no warping
👉 https://amzn.to/3YRLUot - Silicone Baking Mat – less sticking, easier cleanup
👉 https://amzn.to/3YyaXwr
Nice tools make repeat recipes more enjoyable. That matters.
Why This Recipe Keeps Showing Up Everywhere
It solves real problems:
- Crunch cravings
- Healthy-ish snacking
- Simple ingredients
- Minimal effort
That’s why it sticks around.
Ingredients
Method
- Preheat oven to 400°F.
- Pat chickpeas completely dry.
- Toss with olive oil, salt, and garlic powder.
- Roast 25–30 minutes, shaking halfway.
- Remove and add parmesan, garlic, and pepper.
- Roast another 8–10 minutes until crispy.
- Cool slightly before serving.
Notes
- Dry chickpeas thoroughly for crispiness.
- Add parmesan only near the end.
- Don’t overcrowd the pan.
- Best eaten fresh.
Final Thoughts (Crunch Lovers, Listen Up)
Garlic parmesan roasted chickpeas hit that perfect middle ground between indulgent and sensible. They’re easy, flexible, and wildly satisfying. I make them when I want something salty that doesn’t come from a bag—and I never regret it.
Just don’t plan on leftovers 😉