
Some dinners feel fancy. Some feel healthy. And then there are those rare meals that somehow do both without wrecking your entire evening.
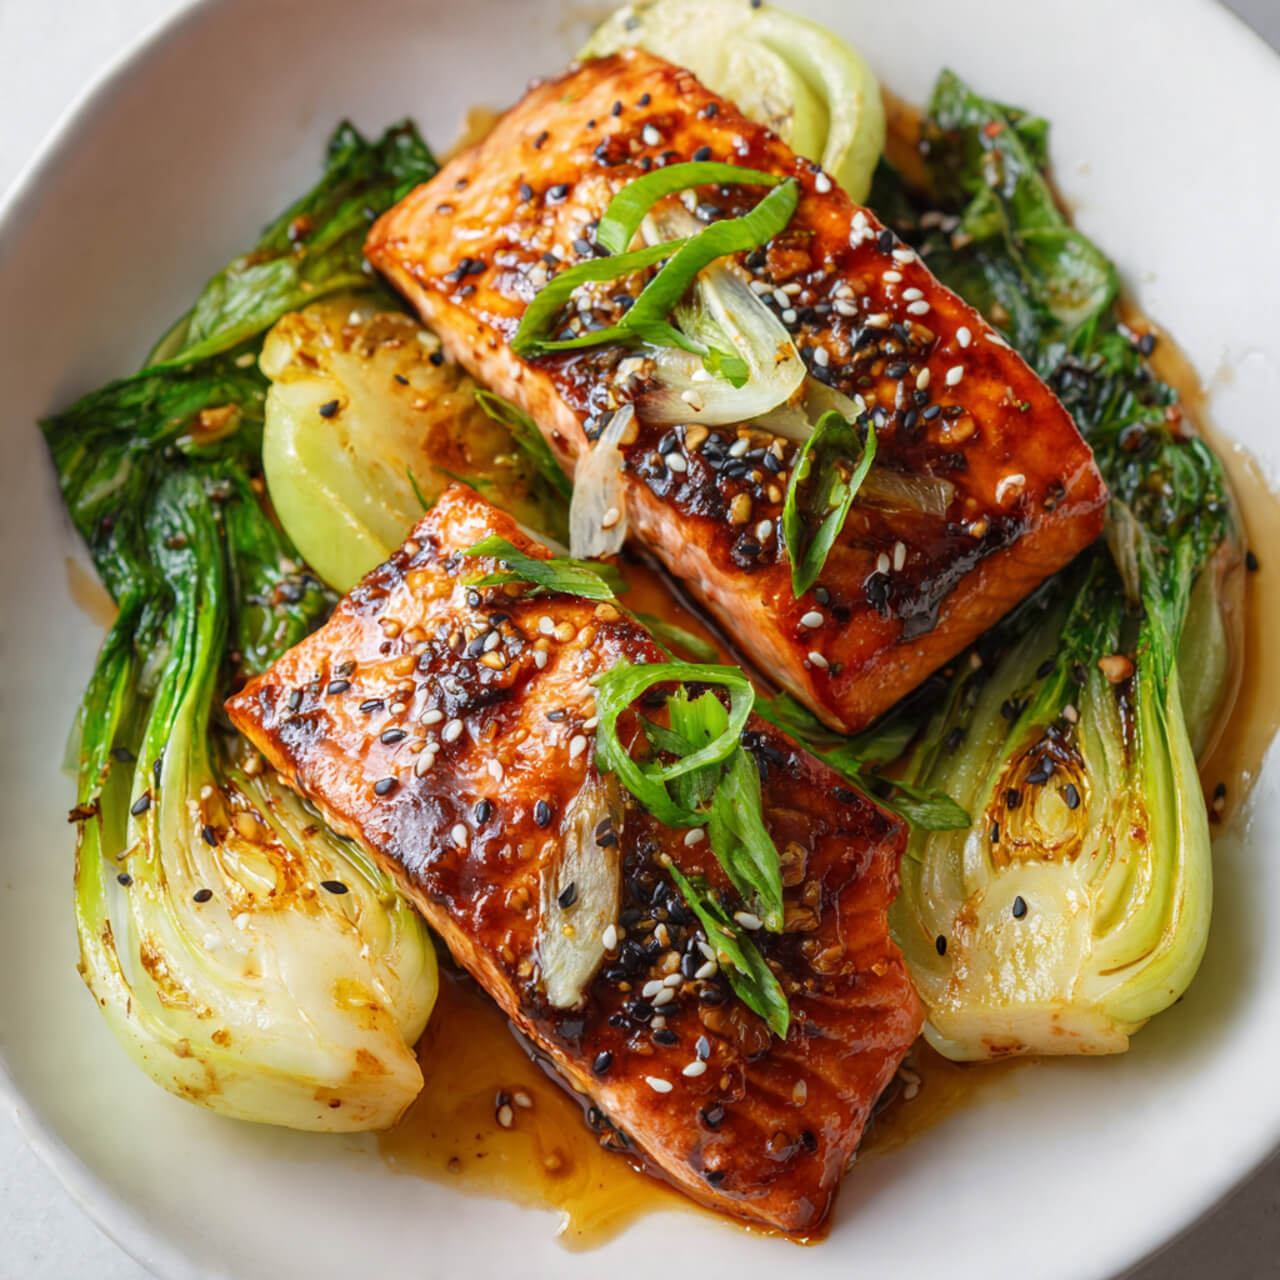
That’s exactly why I keep making miso glazed salmon with bok choy.
The first time I tried miso salmon, I honestly felt intimidated. Miso? Isn’t that something you only order at a sushi restaurant? Turns out, no. It’s shockingly easy to work with, and once you taste that sweet-salty-umami glaze caramelized over flaky salmon… you’ll understand the obsession.
If you’ve been searching for an easy miso glazed salmon recipe, something healthy but not boring, this one hits every mark.
We’re talking:
- Sticky, caramelized miso glaze
- Perfectly baked salmon
- Tender-crisp sautéed bok choy
- A balanced, restaurant-style plate
And yes, I’ll show you exactly how I make it so the salmon stays moist and never overcooked.
Why Miso Glazed Salmon Works So Well
Ever wondered why miso tastes so complex? It packs salt, sweetness, and deep umami in one spoonful.
When you mix miso with a little honey, soy sauce, and rice vinegar, magic happens. The glaze caramelizes in the oven and forms this slightly sticky crust over the salmon.
Here’s what makes this dish stand out:
- High protein, healthy fats from salmon
- Quick cook time
- Balanced flavor
- Light but satisfying
IMO, it feels like something you’d pay $28 for at a trendy spot downtown 🙂
Key Ingredients for the Best Miso Salmon
For the Miso Glaze
- 3 tablespoons white miso paste
- 1 tablespoon honey
- 1 tablespoon soy sauce
- 1 tablespoon rice vinegar
- 1 teaspoon sesame oil
- 1 teaspoon grated fresh ginger
- 1 garlic clove, minced
For the Salmon
- 4 salmon fillets (6 oz each)
- Salt & black pepper
- 1 tablespoon olive oil
For the Bok Choy
- 4 baby bok choy, halved
- 1 tablespoon sesame oil
- 1 garlic clove, sliced
- Pinch salt
Choosing the Right Miso (It Matters)
I use Hikari Organic White Miso Paste
https://amzn.to/4qJ6HpI
White miso tastes milder and slightly sweet. Red miso tastes stronger and saltier.
For salmon, white miso gives the best balance.
Step-by-Step: How I Make Miso Glazed Salmon
Step 1: Make the Glaze
In a small bowl, whisk together:
- White miso
- Honey
- Soy sauce
- Rice vinegar
- Sesame oil
- Ginger
- Garlic
Taste it.
It should taste slightly salty and slightly sweet. That balance becomes perfect once it cooks.
Step 2: Prep the Salmon
Pat the salmon dry with paper towels.
Season lightly with salt and pepper.
Place on a lined baking sheet.
I use the Nordic Ware Natural Aluminum Baking Sheet
https://amzn.to/4qEHFYI
It heats evenly and prevents over-browning on the bottom.
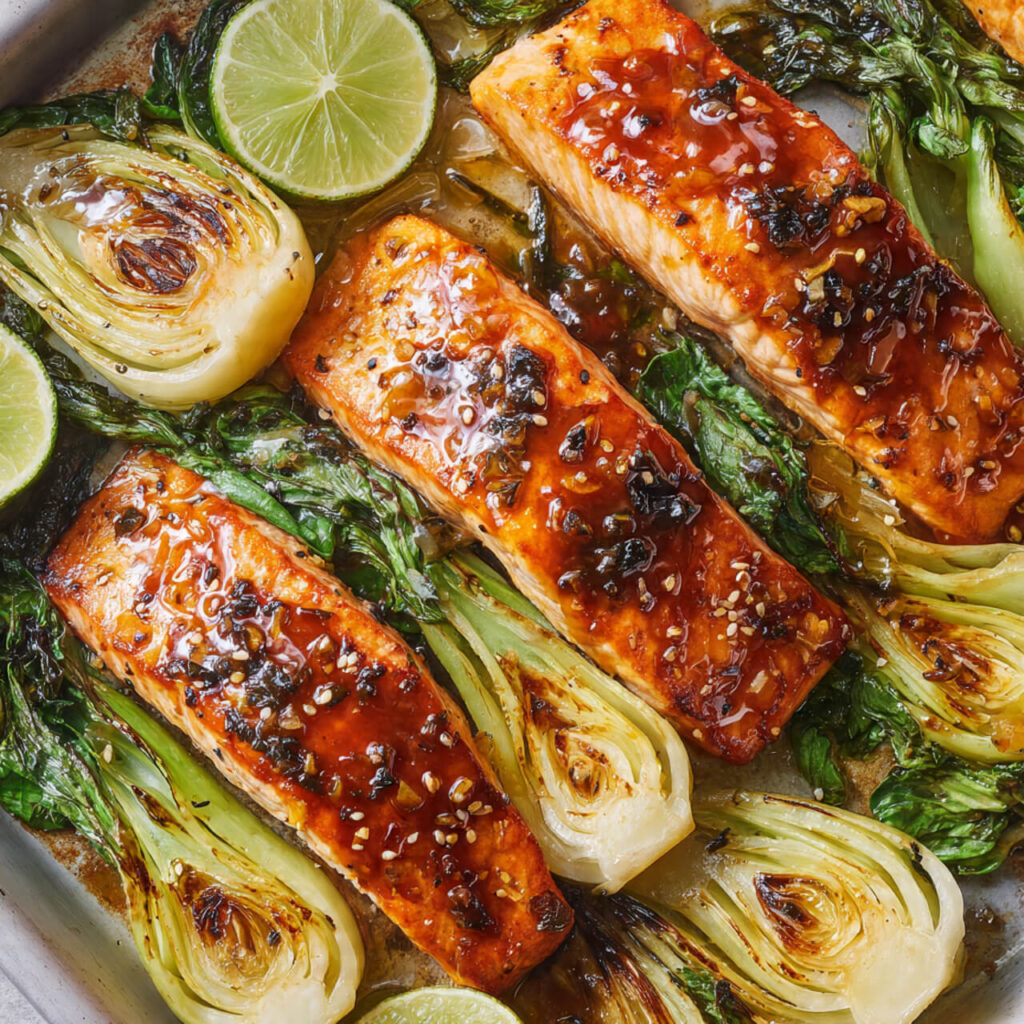
Step 3: Glaze Generously
Brush a thick layer of miso glaze over each fillet.
Don’t be shy here.
Reserve a little glaze for finishing.
Step 4: Bake It Properly
Preheat oven to 400°F.
Bake for 10–12 minutes depending on thickness.
The salmon should flake easily but remain moist in the center.
If you want a deeper caramelization, broil for 1–2 minutes at the end.
Watch it closely. Miso contains sugar. It can burn fast.
How to Cook Bok Choy the Right Way
Bok choy cooks quickly, so I prepare it while the salmon bakes.
Heat sesame oil in a skillet.
Add garlic and cook 30 seconds.
Add bok choy cut-side down.
Cook 2–3 minutes until lightly charred.
Flip and cook another 1–2 minutes.
Season lightly with salt.
It should stay bright green and slightly crisp.
Ever overcooked bok choy and ended up with soggy greens? Yeah… don’t do that.
Pro Tips for Perfect Miso Salmon
After testing this recipe many times, here’s what makes the difference:
1. Don’t Overcook
Salmon continues cooking after leaving oven.
2. Pat the Salmon Dry
Moisture prevents glaze from sticking.
3. Use Fresh Ginger
Powdered ginger lacks brightness.
4. Line the Baking Sheet
Cleanup becomes easier.
Optional Additions
Want to level it up?
- Sprinkle toasted sesame seeds
- Add sliced green onions
- Serve over jasmine rice
- Add chili flakes for heat
I sometimes drizzle a tiny bit of extra sesame oil at the end. It boosts aroma instantly.
Why This Dish Feels So Balanced
When I compare this to heavy cream-based salmon recipes, this one feels lighter but still deeply satisfying.
You get:
- Healthy fats
- High protein
- Minimal carbs
- Bright vegetable side
It works for weeknights. It works for date night. It works when you want to eat something that makes you feel like you have your life together.
Make-Ahead Tips
You can prepare the glaze 2–3 days ahead.
Store in the refrigerator.
Bring to room temperature before using.
Salmon tastes best fresh, but leftovers keep 2 days in fridge.
Reheat gently in oven at 300°F.
Nutrition (Approximate Per Serving)
- Calories: 420
- Protein: 38g
- Fat: 25g
- Carbs: 10g
Balanced. Satisfying. Not heavy.
Ingredients
Method
- Preheat oven to 400°F.
- Whisk glaze ingredients together.
- Pat salmon dry and season lightly.
- Brush glaze generously over salmon.
- Bake 10–12 minutes.
- Broil briefly if desired.
- Sauté bok choy in sesame oil and garlic 3–5 minutes.
- Serve salmon with bok choy and drizzle remaining glaze.
Notes
- Do not overbake salmon.
- Use white miso for balanced sweetness.
- Pat salmon dry before glazing.
- Broil carefully to avoid burning.