
I still remember the first time I tried making no-bake Bounty bars at home. It was one of those lazy Sunday afternoons where turning on the oven felt like a personal attack. I wanted something chocolatey, coconutty, and nostalgic—without breaking a sweat. One bowl, a saucepan, zero baking, and suddenly… boom. Magic happened.
If you love the classic Bounty bar but wish it tasted fresher, creamier, and a little more indulgent, you’re in the right place. IMO, once you make these at home, store-bought versions start feeling a bit “meh.” Ever wondered why homemade ones hit differently? Let’s talk about it.
Why I Keep Making These No-Bake Bounty Bars on Repeat
I’ve tested a lot of no-bake desserts over the years, and these bars stay in my rotation for a reason. They check every box.
- No oven required (your summer self will thank you)
- Simple ingredients you probably already own
- Naturally gluten-free
- Customizable—sweetness, chocolate type, thickness, all up to you
Plus, they store beautifully in the fridge, which means midnight snack security. FYI, I’ve hidden these behind the vegetables more times than I’d like to admit 🙂
What Makes These Better Than Most Recipes Out There
I spent way too much time reading other recipes before settling on my version. Some turned grainy. Others tasted flat. A few used weird ratios that made the coconut layer crumble apart like sad beach sand.
Here’s what actually works—and why this version delivers every time:
- Full-fat coconut milk instead of just condensed milk alone
- Finely shredded coconut for that melt-in-your-mouth texture
- Good-quality chocolate with cocoa butter (non-negotiable)
- A short chill time so the bars stay soft, not rock hard
Ever bitten into a coconut bar and felt like you needed a glass of water immediately? Yeah, we’re avoiding that.
Key Ingredients That Make or Break the Recipe
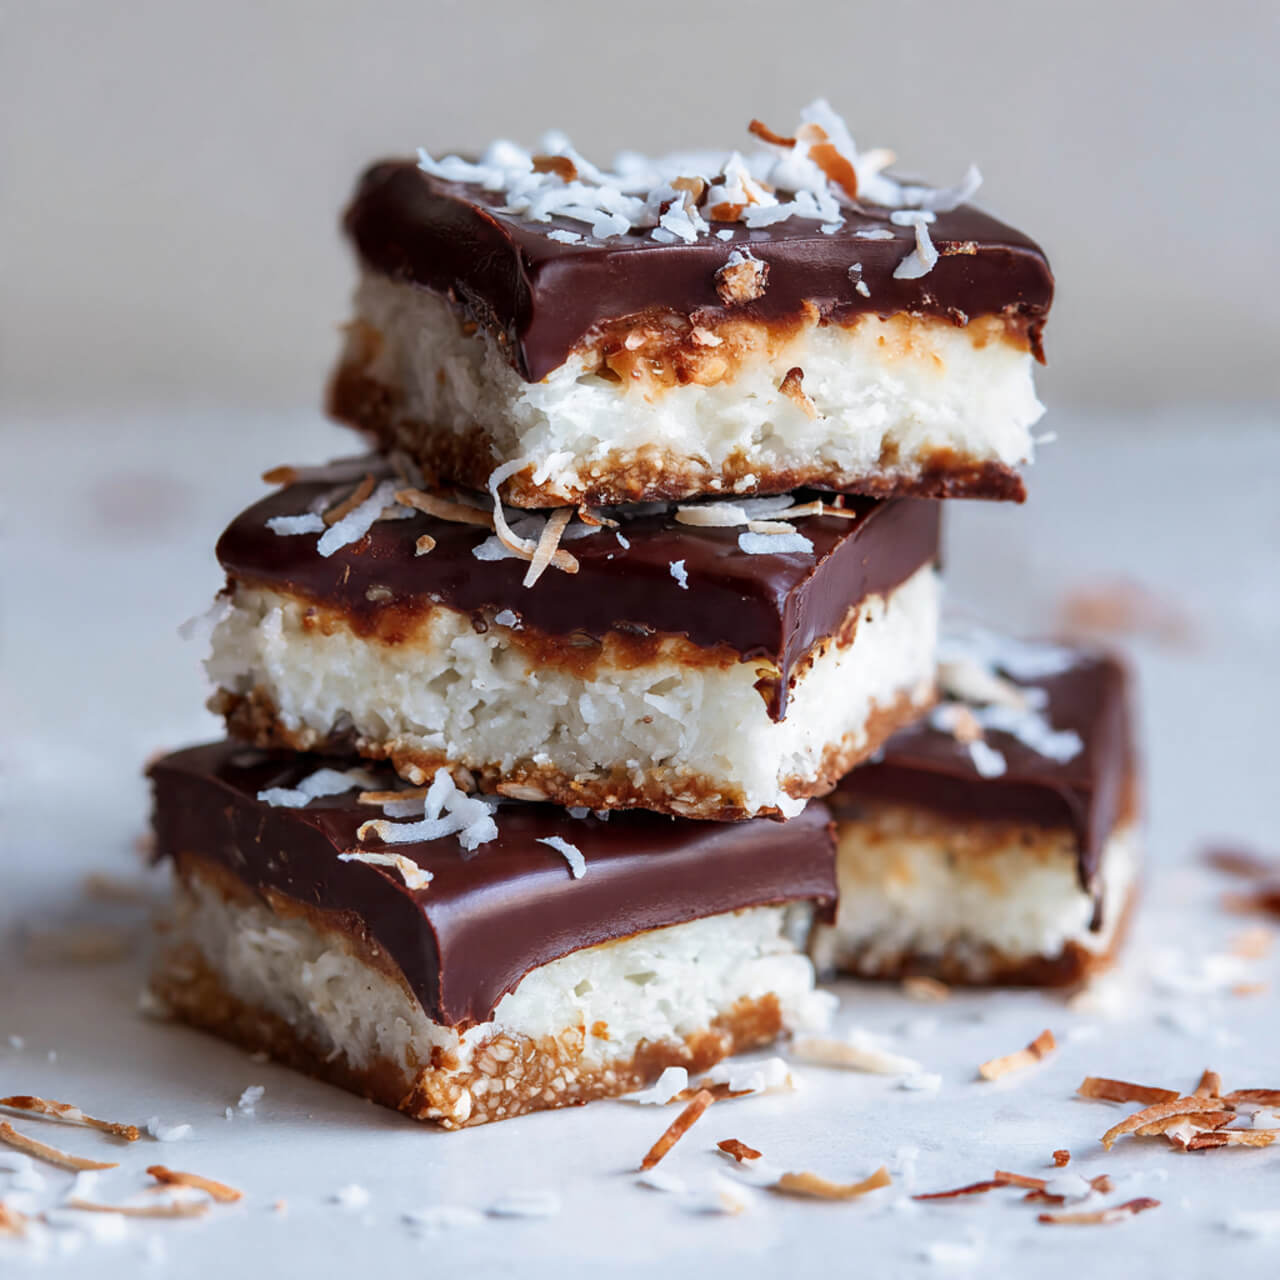
Coconut Layer Essentials
This layer should taste creamy, lightly sweet, and soft enough to bite through cleanly.
- Unsweetened shredded coconut – Skip the long shreds. Fine coconut blends better.
- Sweetened condensed milk – This binds everything without baking.
- Full-fat coconut milk – Adds richness and keeps the bars tender.
- Vanilla extract – Small detail, big payoff.
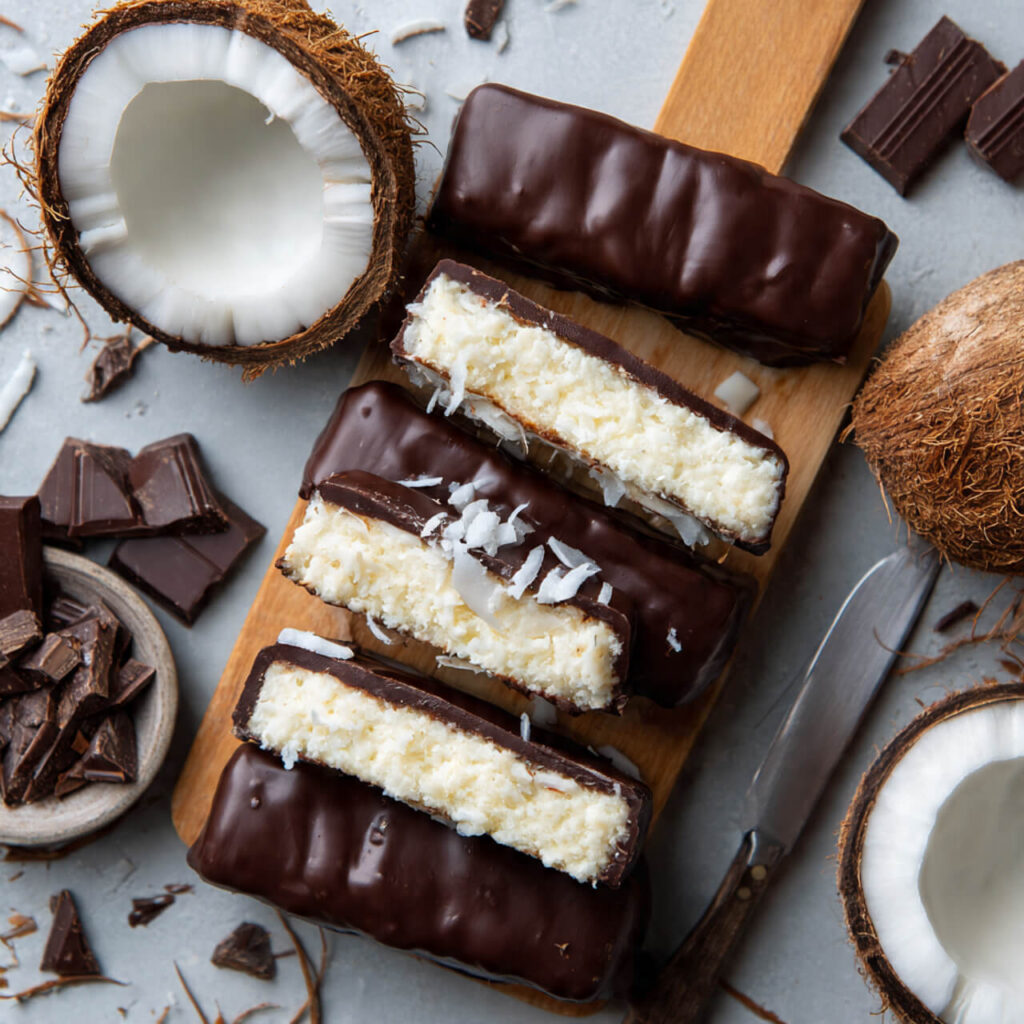
Chocolate Coating (Don’t Cheap Out Here)
Chocolate does the heavy lifting flavor-wise.
- Dark or milk chocolate (your call)
- Coconut oil – Helps the chocolate set with a smooth snap
I usually melt chocolate using a double boiler, but when I feel impatient, I grab my microwave-safe bowl from Amazon. This one has survived years of abuse:
👉 https://amzn.to/4aMH82K
My Step-by-Step Method (With Real-Life Tips)
Step 1: Make the Coconut Filling
I dump the shredded coconut, condensed milk, coconut milk, and vanilla into a bowl. I mix until everything looks thick but scoopable. If it feels dry, I add a tablespoon of coconut milk. If it feels loose, I sprinkle in more coconut.
Trust your eyes here. Recipes don’t live in your kitchen—you do.
Step 2: Shape the Bars
I line a loaf pan with parchment paper and press the mixture firmly into it. Pressing matters. I use the bottom of a measuring cup to compact everything evenly.
Then I chill it for 30–40 minutes. Don’t rush this part, or the bars will fall apart later. Ask me how I know :/
Step 3: Melt the Chocolate
I melt chocolate with coconut oil until glossy and smooth. I keep the heat gentle. Burnt chocolate ruins moods.
A small silicone spatula helps here. I use this one constantly:
👉 https://amzn.to/49LL2H1
Step 4: Dip and Coat
I slice the coconut slab into bars, dip each one into chocolate, and place them on parchment. I tap off excess chocolate because thick puddles taste messy.
Then I chill again for 15 minutes until set.
That’s it. No baking. No drama.
Tips I Learned the Hard Way (So You Don’t Have To)
- Use room-temperature coconut mixture before shaping—it presses better.
- Freeze briefly if your kitchen runs warm.
- Don’t overheat chocolate, or it turns dull and grainy.
- Slice with a warm knife for clean edges.
Small tweaks = big difference.
Flavor Variations I Actually Love
Once you nail the base, it’s fun to experiment.
Dark Chocolate Sea Salt
Sprinkle flaky sea salt on top before the chocolate sets. Sweet + salty always wins.
Almond Joy Style
Press a whole roasted almond into each bar before coating. Classic move.
Low-Sugar Version
Use unsweetened chocolate and reduce condensed milk slightly. Still delicious, just less sweet.
Ever tried white chocolate on these? I did once. It disappeared fast.
Storage & Make-Ahead Advice
I store these in an airtight container in the fridge for up to 7 days. They also freeze beautifully for up to 2 months.
Pro tip: Separate layers with parchment so they don’t stick together. Future-you will appreciate that.
Why These Bars Always Impress Guests
People assume these took way more effort than they did. I’ve served them at BBQs, holiday dinners, and casual coffee hangouts. Every time, someone asks for the recipe.
And every time, I smile because… no oven 🙂
Ingredients
Method
- Mix shredded coconut, condensed milk, coconut milk, and vanilla in a bowl until thick and combined.
- Line a loaf pan with parchment paper and press the mixture firmly into the pan.
- Chill for 30–40 minutes until firm.
- Melt chocolate and coconut oil together until smooth.
- Slice coconut mixture into bars.
- Dip each bar into melted chocolate and place on parchment paper.
- Chill for 15 minutes until set. Serve cold or slightly chilled.
Notes
- Use finely shredded coconut for best texture.
- Adjust sweetness by reducing condensed milk slightly.
- Chill bars before slicing for clean edges.
- Store in fridge or freezer for best results.