
I’ll just say it upfront: No-Bake Chocolate Fudge is the dessert I make when life feels loud, time feels short, and my chocolate cravings feel… urgent. You know those moments when baking feels like too much commitment? No preheating. No candy thermometers. No stress. Just chocolate doing what chocolate does best—making everything better.
I’ve made this fudge for holidays, potlucks, late-night fridge raids, and one memorable Tuesday where I ate it straight from the pan with a spoon. No regrets. If you’re looking for a rich, smooth, foolproof chocolate fudge that doesn’t involve turning on your oven, you’re about to fall hard for this recipe.
My First Experience With No-Bake Fudge (And Why I Never Looked Back)
I grew up thinking fudge required serious skill. My aunt used to hover over a stove like she was guarding state secrets. Then one day, I tried a no-bake version out of curiosity.
I melted chocolate, stirred a few things together, poured it into a pan, and waited. That was it. When I sliced into it later, the texture was perfect—dense, creamy, and deeply chocolatey. I honestly felt a little betrayed that it had been that easy all along.
What Makes No-Bake Chocolate Fudge Actually Good?
Not all no-bake fudge is created equal. Some versions taste flat. Others taste overly sweet. This one works because it balances fat, sugar, and cocoa properly.
Here’s why this recipe hits every time:
- Chocolate provides structure
- Sweetened condensed milk adds creaminess
- Butter adds richness
- Salt balances sweetness
Ever wondered why some fudge tastes one-note? Salt. It matters more than people admit.
Ingredients That Matter (And Why I Don’t Cut Corners)
Chocolate
I always use good-quality semi-sweet chocolate chips or bars. Cheap chocolate melts weird and tastes waxy. Not worth it.
Sweetened Condensed Milk
This ingredient replaces boiling sugar entirely. It keeps the fudge smooth and stable.
Butter
Butter adds silkiness. I use unsalted so I control the salt level.
Vanilla + Salt
These two don’t shout, but they absolutely matter.
Kitchen Tools That Make This Effortless
I’ve made this fudge enough times to know what actually helps.
- Pyrex 8×8 Glass Baking Dish – Perfect size, even setting
- Silicone Spatula Heat Resistant – Scrapes every bit of chocolate
- Parchment Paper Sheets – Clean lift, clean cuts
FYI, parchment paper saves your sanity. I never skip it anymore.
How I Make No-Bake Chocolate Fudge (Step-by-Step)
Step 1: Prep the Pan
I line an 8×8 pan with parchment, leaving overhang. This makes lifting the fudge out stupidly easy.
Step 2: Melt Everything Gently
I combine chocolate, butter, and condensed milk in a saucepan over low heat. I stir constantly. Chocolate burns fast and holds grudges.
Step 3: Flavor Boost
Once smooth, I remove the pan from heat and stir in vanilla and salt.
Step 4: Set and Chill
I pour the mixture into the pan, smooth the top, and refrigerate for 2–3 hours.
That’s it. No drama.
Texture Tips I Learned the Hard Way
- Low heat only – High heat ruins chocolate
- Stir constantly – Prevents graininess
- Chill fully before slicing – Patience pays off
- Use a warm knife – Clean cuts every time
Ever sliced fudge too early and regretted it? Same.
Flavor Variations That Actually Work
I tested a lot of variations. These ones never fail:
- Walnut Fudge – Stir in chopped nuts
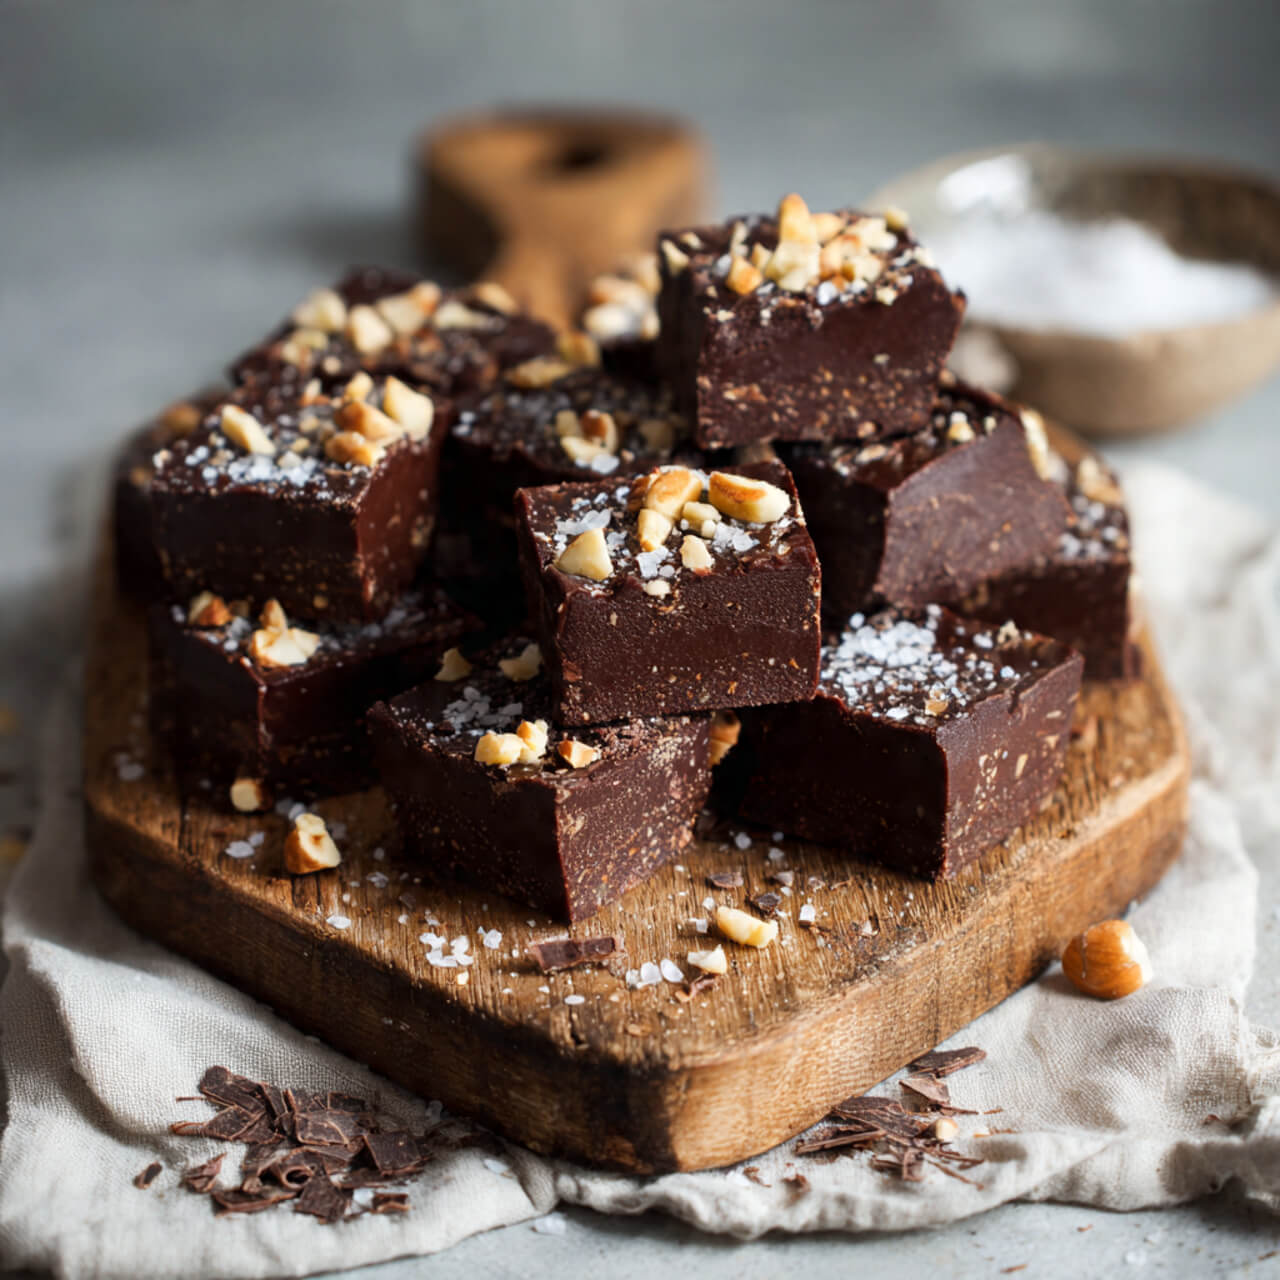
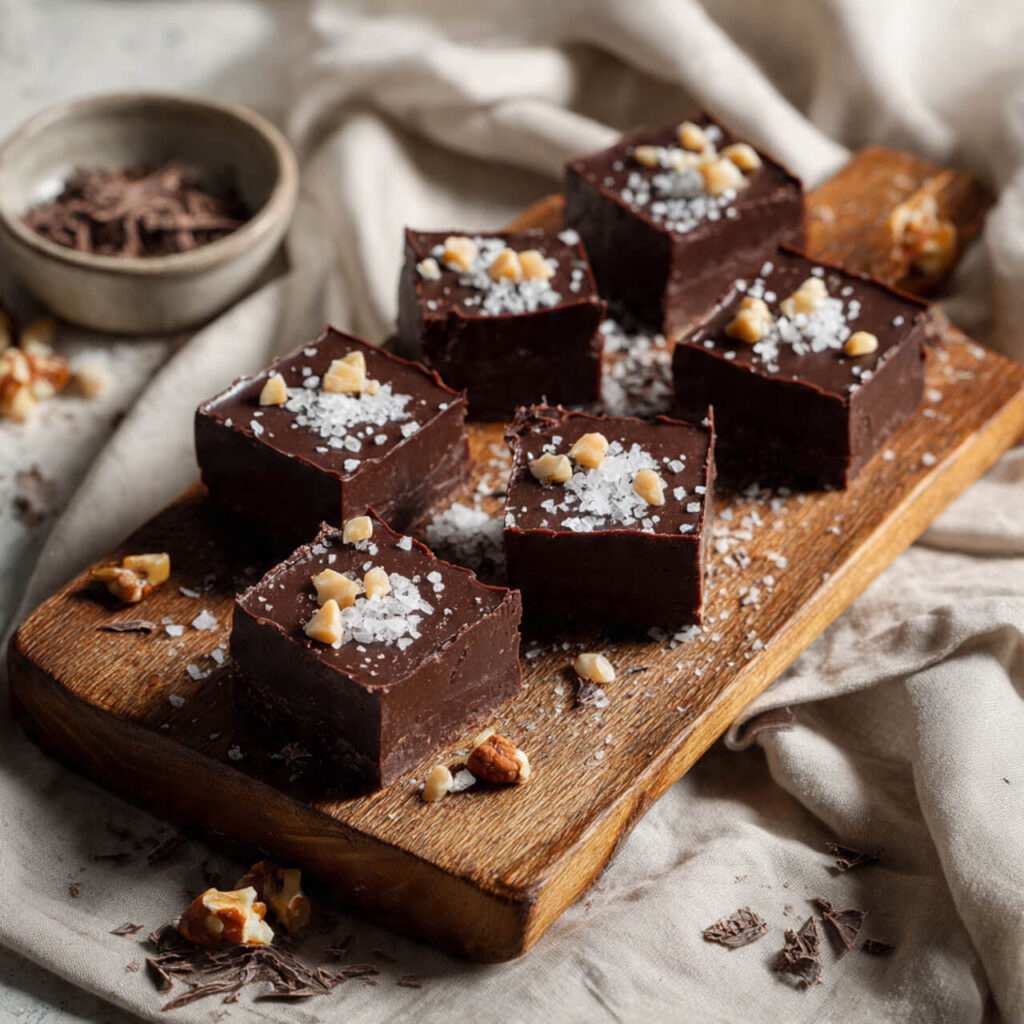
- Sea Salt Fudge – Flaky salt on top
- Peanut Butter Swirl – Drop spoonfuls and swirl
- Mint Chocolate – Add peppermint extract
Some experiments went sideways. White chocolate + lemon? Don’t ask.
Make-Ahead, Storage, and Freezing Tips
This fudge fits real life.
- Fridge: Up to 2 weeks in airtight container
- Freezer: Up to 3 months
- Room temp: 3–4 hours max
I cut it into squares before freezing so I can grab one whenever the mood hits.
Common Mistakes (Let’s Avoid Them)
- Overheating chocolate
- Skipping salt
- Using low-quality chocolate
- Rushing the chill time
Small choices make or break fudge.
Is No-Bake Chocolate Fudge Vegan?
It can be.
- Use dairy-free chocolate
- Swap butter for vegan butter
- Use coconut condensed milk
I’ve tried it. It works beautifully.
Ingredients
Method
- Line an 8×8 pan with parchment paper.
- Melt chocolate, butter, and condensed milk over low heat.
- Stir constantly until smooth.
- Remove from heat and add vanilla and salt.
- Pour into pan and chill 2–3 hours.
- Slice and serve.
Notes
- Use low heat only
- Don’t skip the salt
- Chill completely before cutting
- Store refrigerated
Final Thoughts (From Someone Who Makes This Way Too Often)
No-Bake Chocolate Fudge feels like a cheat code. It tastes like something that should take effort, but it doesn’t. That’s why I keep coming back to it.
If you need a dessert that never fails, never stresses you out, and never disappoints—this is the one.
And yes, eating it straight from the fridge counts. 😉