
Hey, friend, remember those times when the oven feels like the enemy? Yeah, me too. Last summer, I was knee-deep in a backyard BBQ, sweat dripping everywhere, and the crew starts begging for something sweet. No way was I baking in that heat. So, I pulled out my trusty no-bake chocolate peanut butter bars recipe. These bad boys come together in minutes, taste like a grown-up Reese’s, and vanished faster than the burgers. If you’ve ever craved that peanut butter-chocolate magic without the hassle, stick around—I’m spilling all my secrets from years of tweaking this in my own kitchen. Trust me, once you try them, they’ll be your go-to too. 🙂
What Makes These No-Bake Chocolate Peanut Butter Bars So Addictive
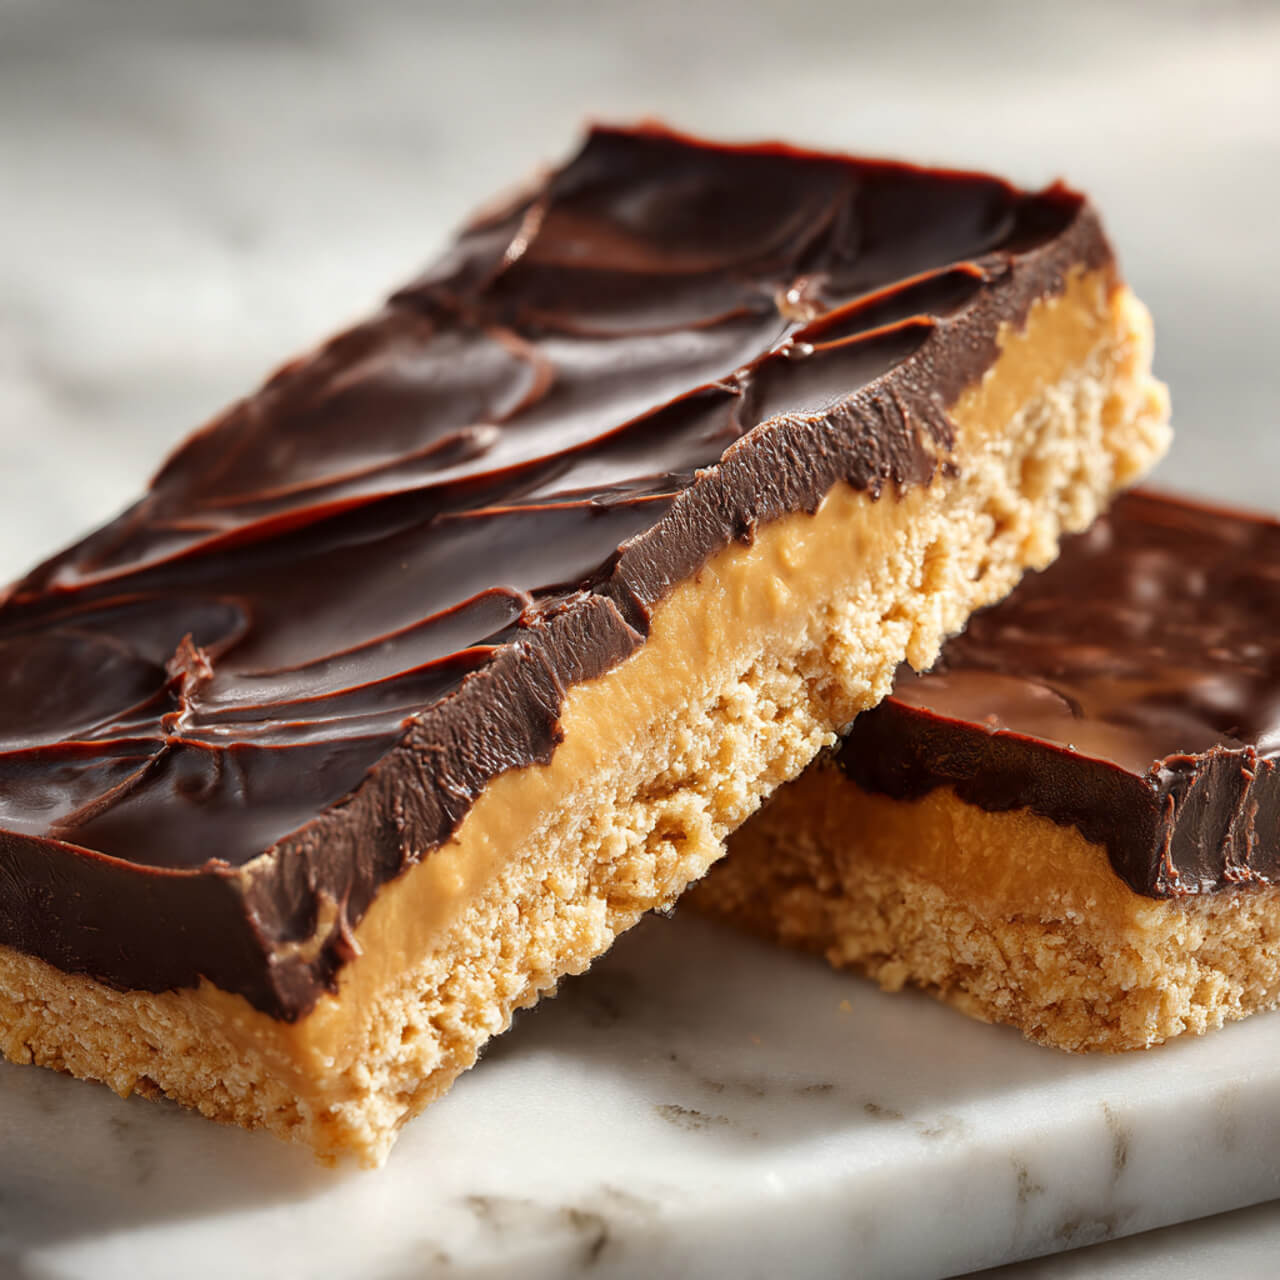
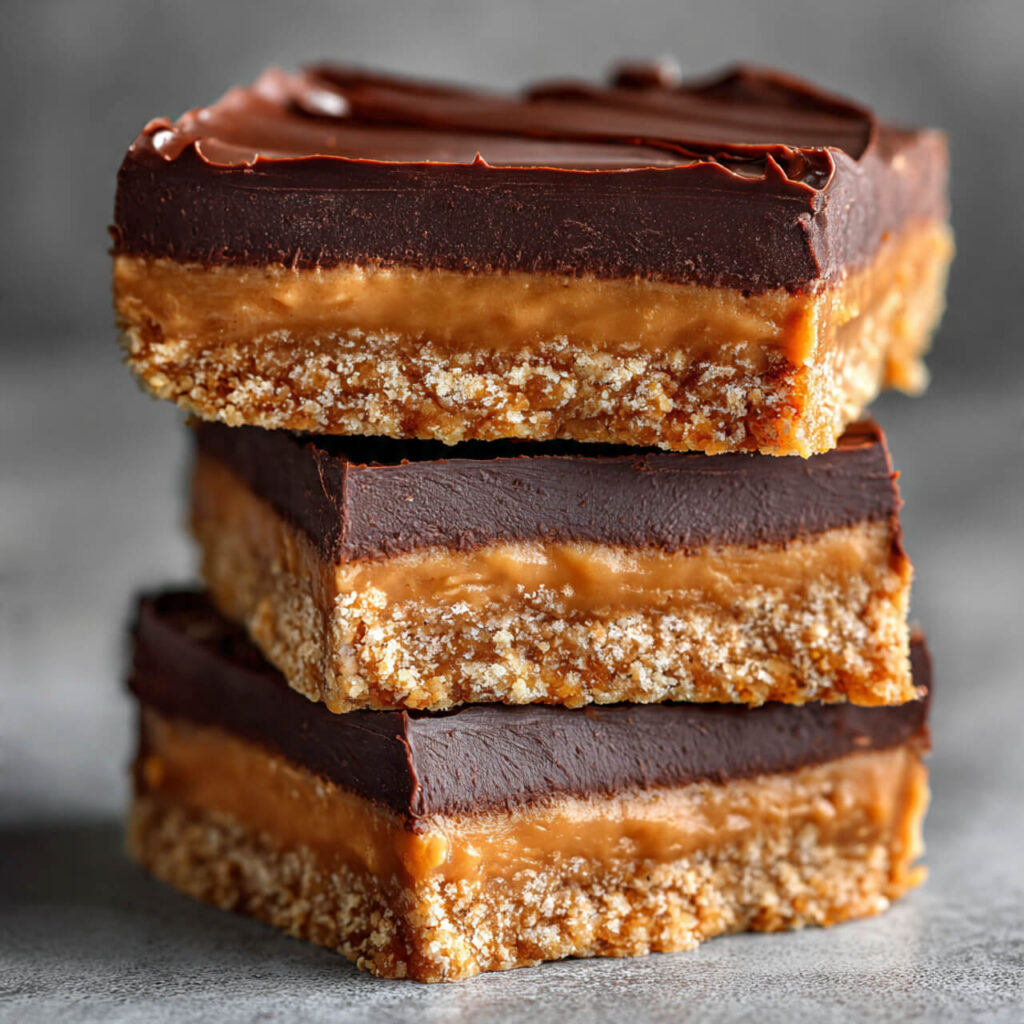
Look, I’ve whipped up countless desserts over the years, but these no-bake chocolate peanut butter bars? They’re in a league of their own. The bottom layer’s this creamy, crumbly peanut butter goodness that sticks to your teeth just right, topped with a shiny chocolate shell that snaps perfectly. I first got hooked during a road trip years back—my sister and I needed a quick snack, and we threw together a version using whatever was in the cooler. It was messy, but man, it hit the spot. Now, I make them for everything from movie nights to last-minute gifts.
Why do they rank so high in my book (and on Google, FYI)? Simplicity wins. No fancy equipment, just five ingredients, and you’re golden. Ever wondered why they feel indulgent yet easy? It’s the balance—peanut butter’s natural saltiness cuts the sweetness, and that chocolate layer seals the deal. Top recipes from spots like Sally’s Baking Addiction and Pioneer Woman echo this: folks love how they mimic candy without the guilt. I add a personal twist with a pinch of sea salt on top; it elevates them from good to “whoa, these are dangerous.”
Honestly, in a world of complicated baking, these bars remind me why I love messing around in the kitchen. They’re forgiving—if your measurements are a tad off, they still turn out great. No perfection required, which is music to this busy mom’s ears.
Stocking Up: Ingredients That Make All the Difference
Let’s chat about what goes in these no-bake chocolate peanut butter bars. I keep my pantry stocked because, well, cravings don’t wait for grocery runs. Start with 1 cup (2 sticks) unsalted butter, melted—it binds everything without overpowering the flavor. Then, 2 cups powdered sugar for that silky sweetness; regular sugar just doesn’t dissolve right here.
Don’t skimp on the 1 1/2 cups graham cracker crumbs—they give the base its structure and subtle crunch. I grab Honey Maid grahams and crush them myself; it’s cheaper and fresher. If you’re ordering online like I do sometimes, snag a box on . Super handy for busy weeks.
The star? 1 1/2 cups creamy peanut butter, split between layers. I swear by Jif—it’s smooth, not too oily, and holds up perfectly. . For the top, 1 1/2 cups semi-sweet chocolate chips melt into heaven.
This makes about 16 bars, each around 220 calories—14g fat, 20g carbs, 5g protein. Not bad for a treat that feels naughty. I once tried natural peanut butter to “healthify” it, but it got too soft. Lesson learned: Stick to the classics unless you’re experimenting.
My Step-by-Step Guide: From Bowl to Bliss
Alright, roll up your sleeves—this takes 20 minutes tops. I usually do it while the kids are napping; it’s my little escape. First, melt the butter in the microwave, about 30 seconds. Stir in the powdered sugar, graham crumbs, and 1 cup peanut butter until it clumps like wet sand. Press it into a parchment-lined 9×13 pan—use the bottom of a glass for evenness. I forgot the parchment once; scrubbing chocolate off foil is no fun. :/
Next, the chocolate magic. In a microwave-safe bowl, combine the chips and remaining 1/2 cup peanut butter. Zap in 15-second bursts, stirring each time, until smooth. Pour over the base and spread gently. If you’re me, sprinkle flaky sea salt here—trust, it adds that wow factor. Slide into the fridge for 2 hours. Or freezer for 30 if you’re impatient like I get sometimes.
Quick tricks I’ve honed over time:
- Warm your mixing bowl first; cold ones make the peanut butter stubborn.
- For clean cuts, dip your knife in hot water—prevents those jagged edges that ruin the look.
- Add chopped peanuts or pretzels to the base for extra bite; my family fights over those chunks.
- Vegan swap? Coconut oil for butter and dairy-free chips. I tested it for a neighbor—spot on.
One rainy afternoon, I made a double batch and swirled extra peanut butter on top before chilling. The kids declared it “the best ever.” Moments like that? Pure kitchen joy.
Digging Into the Nutrition: Smarter Than Your Average Candy
I didn’t always think about calories, but after a few too many “just one more” moments, I started paying attention. These no-bake chocolate peanut butter bars clock in at 220 calories each, thanks to peanut butter’s protein punch. Breakdown: 14g fat (healthy ones from nuts), 20g carbs, 5g protein. It’s like a snack that sustains you, not just spikes your sugar.
Compared to a Reese’s (around 200 calories but loaded with junk), these feel cleaner. Top Google hits like Allrecipes and Healthy-Liv stress the fiber from graham crumbs and antioxidants in dark chocolate swaps. I switched to 60% cacao chips once—less sweet, more satisfying. Ever pondered if dessert can be “good” for you? In moderation, yeah—these keep me full longer than cookies.
For gluten-free, use certified crumbs; allergies? Sunflower butter works in a pinch. No judgments here—adapt and enjoy.
Fun Twists: How I Keep These Bars Exciting
Variety’s the spice of life, right? After making the classic a zillion times, I play around. Drawing from Pinterest faves and sites like RecipeTin Eats, here’s what I love:
- Protein Boost: Fold in vanilla protein powder to the base—turns them into post-gym fuel, adding 10g protein. My hubby swears by this.
- Oatty Upgrade: Half oats, half crumbs for more chew and fiber. Tastes like a granola bar exploded in the best way.
- Chunky Vibes: Stir in mini Reese’s or toffee bits. Pioneer Woman’s version inspired this; it’s party-ready.
- Seasonal Flair: White chocolate drizzle for holidays, or cayenne in the chocolate for a spicy kick. I tried that for a date night—bold move!
Last fall, I added pumpkin puree to the base for a seasonal twist. It flopped texture-wise, but the flavor? Genius. Experimenting keeps cooking fun—don’t fear the tweaks.
Storing Secrets and Serving Smarts
These bars travel well and last. Fridge them in a tight container for a week; they’ll firm up nicely. Freezer? Up to three months—thaw on the counter for fudgy perfection. I stash extras for “emergencies,” like surprise guests.
Serve chilled with coffee, or room-temp for softer bites. Crumble over vanilla ice cream? Game-changer. At my sister’s wedding shower, I plated them with strawberries—fancy without effort. Top articles rave about make-ahead ease; it’s why they pin like crazy on Pinterest.
Pro storage tip: Layer with wax paper to prevent sticking. I learned after a sticky disaster once—lesson in patience.
Dodging Disasters: My Hard-Won Lessons
Nobody’s perfect, and neither are first tries. Chocolate seizing? Stir constantly—microwave mishaps happen if you rush. Base too dry? A splash more peanut butter saves it. From scanning top recipes like Preppy Kitchen’s, everyone agrees: Room-temp ingredients mix best.
I botched a batch rushing for a bake sale—gooey mess. Now, I chill overnight for foolproof slices. Sarcasm alert: Who knew waiting could make treats better? Haha. For allergies, read labels twice; peanuts are sneaky.
Humidity’s a foe too—extra fridge time in muggy weather. These pitfalls? Easy fixes once you know.
Ingredients
Method
- Combine melted butter, powdered sugar, graham cracker crumbs, and 1 cup peanut butter in a bowl. Mix until dough-like, then press into a parchment-lined 9×13-inch pan.
- Melt chocolate chips with 1/2 cup peanut butter in the microwave (15-second intervals, stirring until smooth). Spread over the base.
- Refrigerate for 2 hours. Cut into bars and serve.
Notes
- Melt chocolate slowly to avoid seizing; stirring prevents lumps every time.
- For sharper slices, chill the pan longer or use a hot knife—keeps edges clean.
- In warm climates, store in the fridge always; they soften quickly at room temp.
- Add sea salt flakes post-chill for a flavor pop—simple upgrade that impresses.
Wrapping It Up: Why You’ll Love These Forever
There you have it—my love letter to no-bake chocolate peanut butter bars. They’re quick, craveable, and endlessly tweakable, fitting right into chaotic days. Grab that Jif from Amazon (link above) and give ’em a shot; your taste buds will thank you. What’s your favorite twist? Hit me up in the comments—I live for recipe chats. Sweet dreams, or should I say, sweet bars? 🙂