
I’ll be honest right out of the gate. No-Bake Lotus Biscoff Bars entered my life during a full-blown dessert emergency. You know the kind. Friends coming over. No time. Oven already dirty. Energy level hovering somewhere between “meh” and “don’t ask.”
Then I remembered Biscoff. That magical, caramelized cookie butter that somehow tastes like cookies, brown sugar, and nostalgia all rolled into one jar. Ever wondered why people lose self-control around it? Yeah… same.
These bars became my go-to after that night. I’ve made them for potlucks, birthdays, random Tuesdays, and once at midnight because I “needed something sweet.” They always disappear fast. Always. And people always ask for the recipe—like I spent hours on it. I don’t correct them. 😉
Why No-Bake Lotus Biscoff Bars Are Worth the Hype
Let’s break this down without overthinking it.
These bars win because they check all the boxes:
- No baking. Zero. None.
- Minimal ingredients you can find in any U.S. grocery store
- Rich, layered texture (crunchy base + creamy center = chef’s kiss)
- Perfect make-ahead dessert for parties or busy weeks
Most popular Biscoff dessert recipes rely on the same formula: cookie crust, creamy filling, glossy topping. This version nails that balance without feeling heavy or overly sweet.
My Love Affair with Lotus Biscoff (Quick Backstory)
I didn’t grow up with Lotus Biscoff cookies. I met them as an adult—specifically on a flight, when the snack cart handed me two tiny cookies and a life-changing moment.
Fast forward a few years, and Biscoff cookie butter became a permanent pantry resident. IMO, it works better than peanut butter in desserts. It melts smoother. It tastes deeper. And it plays really well with cream cheese.
Ingredients That Actually Matter (And Why)
Lotus Biscoff Cookies
These form the base. I crush them into fine crumbs for a sturdy crust.
Pro tip: I use a food processor, but a zip-top bag and rolling pin work just fine. Rage-crushing cookies counts as stress relief, right?
Unsalted Butter
Melted butter binds the crust. I always use unsalted so I control the sweetness.
Cream Cheese
Full-fat only. Low-fat versions mess with the texture, and I refuse to compromise here.
Powdered Sugar
This dissolves smoothly and keeps the filling silky. Granulated sugar ruins the vibe.
Lotus Biscoff Spread
The star of the show. I use it in the filling and on top.
I usually buy Lotus Biscoff Cookie Butter, Creamy, 14.1 oz from Amazon because it arrives fast and saves me a grocery run.
👉 Amazon link: https://amzn.to/4jbOmiJ
Tools I Always Use (Because They Make Life Easier)
I learned pretty quickly that clean bars require the right tools.
9×9 Inch Baking Pan
Metal pans chill faster and release cleaner slices than glass.
Parchment Paper
I line the pan with overhang. This makes lifting the bars out stupidly easy.
Offset Spatula
For smooth layers, I swear by this Ateco Offset Spatula.
👉 Amazon link: https://amzn.to/4jbOoal
Is it essential? No. Does it make the bars look bakery-level? Yes.
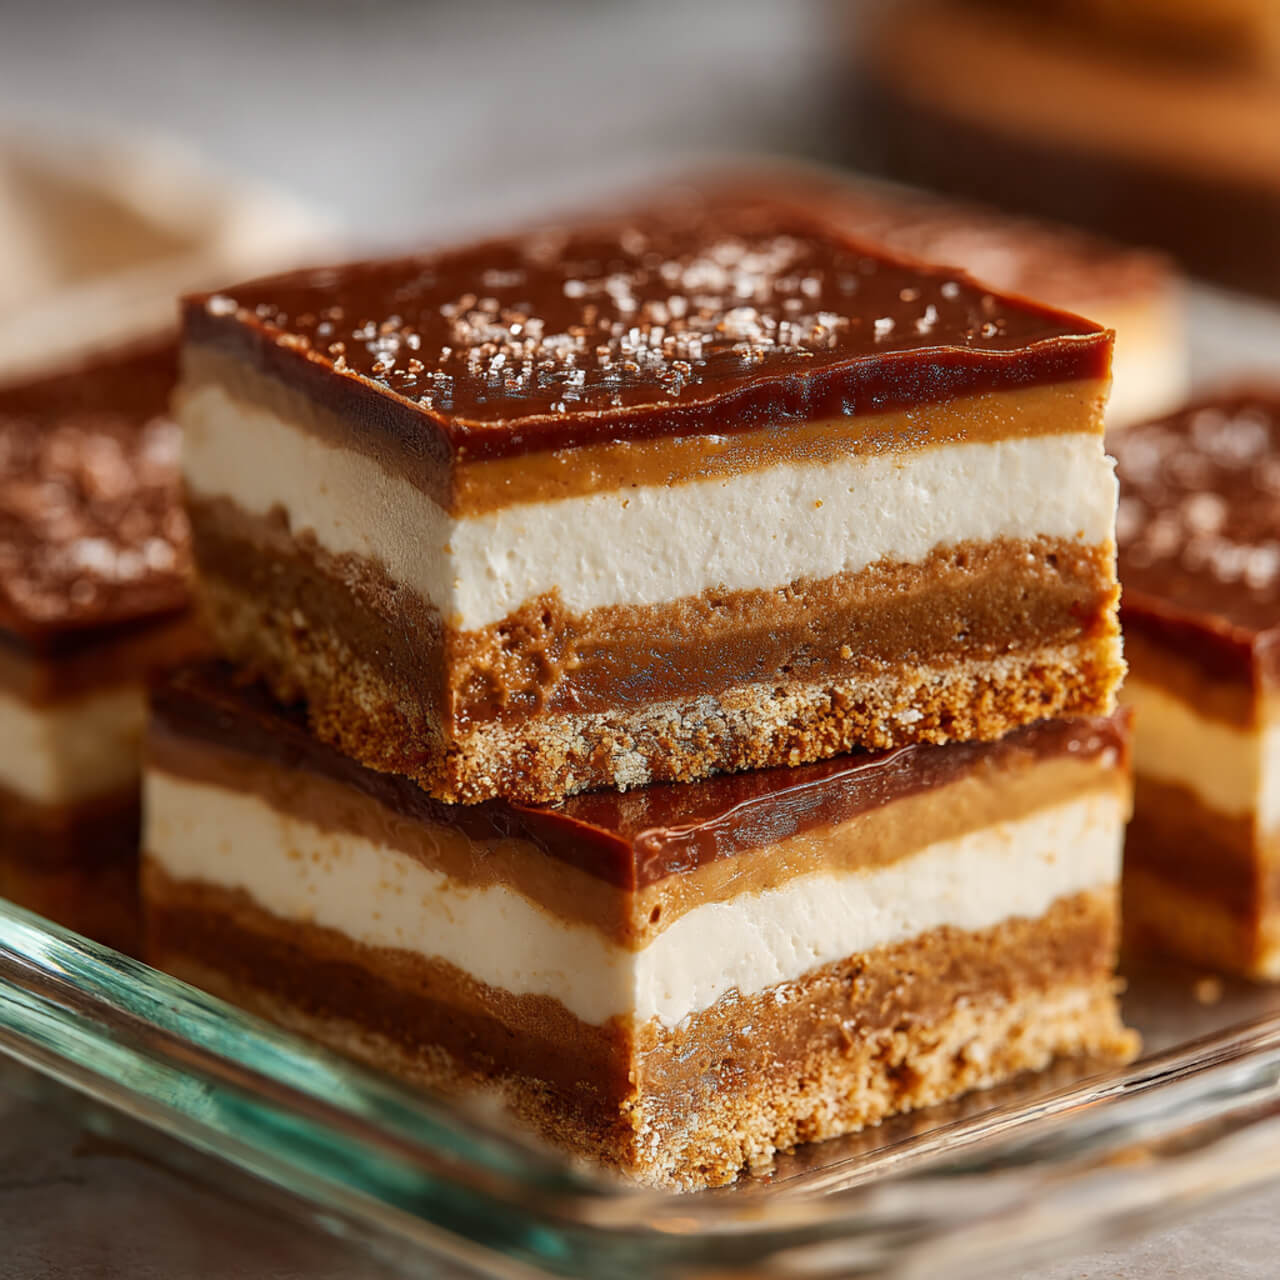
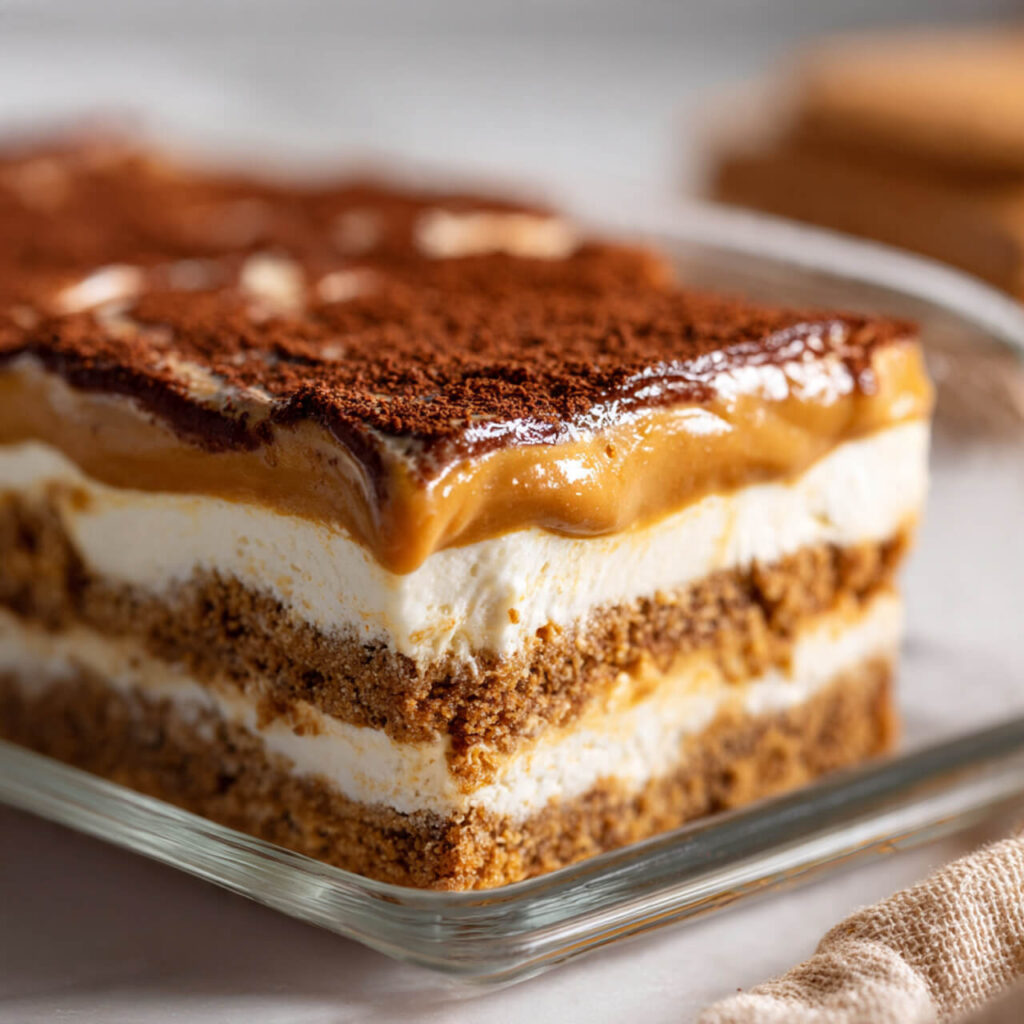
How I Make No-Bake Lotus Biscoff Bars (Step-by-Step)
Step 1: Make the Crust
I crush the Biscoff cookies until they look like fine sand. Then I mix them with melted butter until the crumbs hold together.
I press the mixture firmly into the pan. Firm matters here. I use the bottom of a measuring cup and don’t rush this step.
Step 2: Chill the Base
I pop the crust into the fridge for about 15 minutes. This helps it set before the filling goes on.
Ever skipped this step and regretted it? I have. Don’t be me.
Step 3: Whip the Filling
I beat softened cream cheese until smooth, then add powdered sugar and Biscoff spread.
The texture should look thick but spreadable—like a soft frosting. I taste it. Always. Quality control matters.
Step 4: Spread and Smooth
I spread the filling over the chilled crust and smooth it out evenly. No need to stress over perfection. The topping hides small flaws.
Step 5: Melt the Topping
I gently warm more Biscoff spread until pourable. I drizzle it over the filling and smooth it out.
FYI, microwave in short bursts. Overheating ruins the texture :/
Step 6: Chill (The Hardest Part)
I refrigerate the bars for at least 4 hours, but overnight works best.
Tips I Wish I Knew Sooner
Chill Longer Than You Think
If the bars feel soft, they need more time. Patience pays off.
Use Room-Temperature Cream Cheese
Cold cream cheese creates lumps. Nobody wants that.
Clean Cuts = Hot Knife
I dip a knife in hot water, wipe it dry, and slice. Repeat each cut.
Balance the Sweetness
If you like less sweet desserts, add a pinch of salt to the filling. Game changer.
Variations I Actually Make (Not Just Saying That)
Chocolate Biscoff Bars
I add a thin layer of melted chocolate between the crust and filling. Dangerous, but worth it.
Cheesecake-Style Bars
I add a splash of vanilla extract and a bit more cream cheese for a tangier bite.
Mini Biscoff Bars
I make them in muffin liners for portion control. (LOL, who am I kidding?)
Why These Bars Always Win at Parties
- They slice clean
- They travel well
- They look fancy
- They require zero baking skill
People assume effort. I smile and accept compliments.
Ingredients
Method
- Line a 9×9 pan with parchment paper.
- Mix cookie crumbs with melted butter. Press firmly into pan.
- Chill crust for 15 minutes.
- Beat cream cheese until smooth.
- Add powdered sugar and 1 cup Biscoff spread. Mix well.
- Spread filling over crust.
- Melt remaining Biscoff spread and spread on top.
- Chill for 4 hours or overnight.
- Slice and serve
Notes
- Use full-fat cream cheese for best texture.
- Chill overnight for cleanest slices.
- Warm topping gently to avoid separation.
- Store refrigerated up to 5 days.