
I’m just going to say it—No-Bake Moose Farts might have the most ridiculous name in the dessert universe, and that’s exactly why people remember them. The first time I brought these to a family get-together, my uncle laughed so hard he almost dropped his plate. Five minutes later? He asked for the recipe. Funny how that works, right? 😄
If you’ve never made them, don’t worry. I’ve been rolling these little Canadian gems for years—holidays, potlucks, last-minute “oh no, I forgot dessert” moments. They’ve never failed me. Not once. And yes, they’re no-bake, dangerously easy, and basically impossible to mess up.
This article walks you through everything—why this recipe works, my personal tweaks, common mistakes, storage tips, and the exact step-by-step method I use every single time.
Why No-Bake Moose Farts Are So Popular (And Always Will Be)
Ever noticed how the simplest recipes become family legends? That’s Moose Farts in a nutshell.
What makes them special?
- No oven required (aka summer-friendly desserts)
- Simple pantry ingredients
- Kid-approved, adult-loved
- Ridiculous name = instant conversation starter
IMO, the name alone deserves an award. But beyond that, the texture hits perfectly—soft, chewy, coconutty, and sweet without being tooth-achingly intense. Ever wondered why people keep sneaking back for “just one more”? Yep, that texture combo does the trick.
A Little Backstory (Because Food Always Has One)
Moose Farts originated in Canada, where cozy desserts rule and humor runs free. You’ll see them pop up at Christmas parties, school bake sales, and potlucks across the country.
When I first learned this recipe, it came handwritten on a recipe card smudged with butter and coffee stains. That’s usually how you know a recipe is legit, right?
I’ve tested small tweaks over the years, but I always come back to the classic version. Why fix something that already slaps?

Ingredients You’ll Need (Nothing Fancy, Promise)
Here’s the beauty of this recipe—you probably already have most of this stuff.
Main Ingredients
- Sweetened condensed milk – the glue that holds everything together
- Graham cracker crumbs – structure + mild sweetness
- Shredded coconut – texture and flavor (unsweetened works best)
- Chocolate chips – because chocolate fixes everything
- Vanilla extract – subtle but essential
I always keep Eagle Brand Sweetened Condensed Milk in my pantry. It’s consistent and smooth every time. You can grab it here:
For coconut, I swear by Bob’s Red Mill Unsweetened Shredded Coconut. It doesn’t taste fake or overly dry:
Step-by-Step: How I Make No-Bake Moose Farts
Step 1: Mix the Dry Ingredients
Grab a large mixing bowl. Add:
- Graham cracker crumbs
- Shredded coconut
- Chocolate chips
Stir until everything looks evenly mixed. Don’t rush this part. Even distribution matters more than people think.
Step 2: Add the Wet Ingredients
Pour in:
- Sweetened condensed milk
- Vanilla extract
Now stir. Slowly. The mixture thickens quickly, so don’t panic. I usually switch to a spatula halfway through to save my wrist.
Step 3: Chill the Dough
Pop the bowl into the fridge for 20–30 minutes.
This step makes rolling a breeze. Skip it, and you’ll fight sticky chaos. Ask me how I know 🙃
Step 4: Roll Into Balls
Scoop about 1 tablespoon per piece and roll into balls.
A cookie scoop helps keep sizes even. This OXO Medium Cookie Scoop saves time and sanity:
Step 5: Roll in Coconut
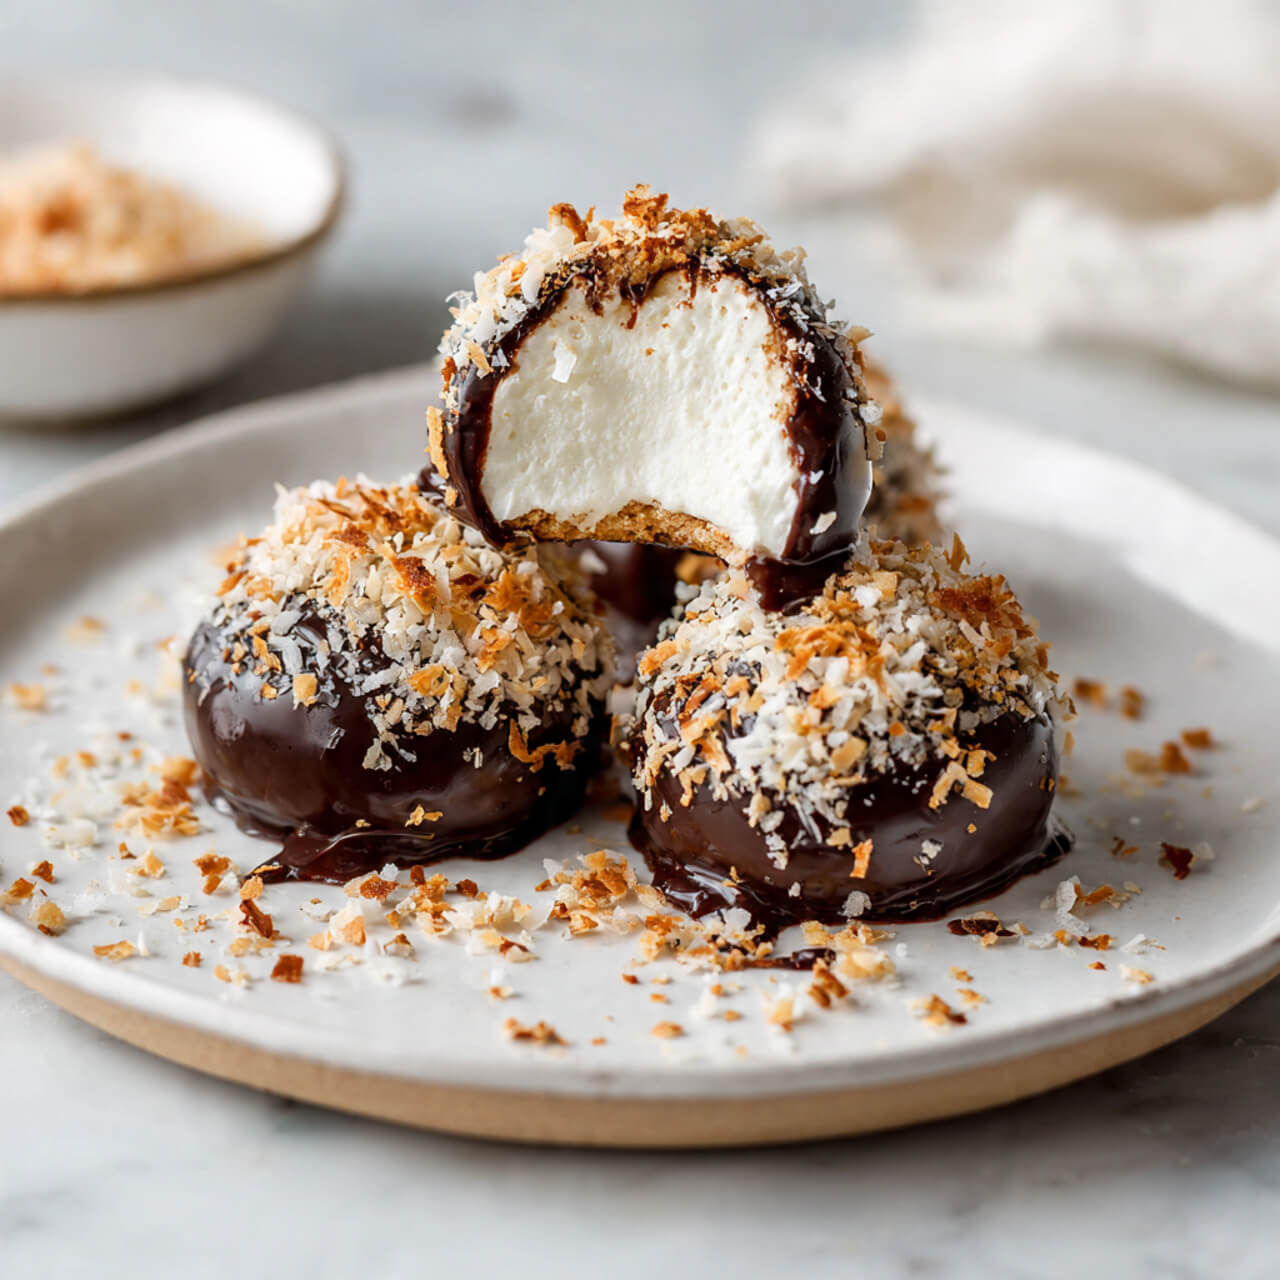
Roll each ball in extra shredded coconut until coated.
Set them on parchment paper and admire your work for a second—you earned it.
Pro Tips I Learned the Hard Way
Don’t Skip the Chill Time
Warm dough sticks. Cold dough behaves. This isn’t negotiable.
Use Unsweetened Coconut
Sweetened coconut pushes these into “too much” territory fast. Balance matters.
Want a Flavor Twist?
Try:
- Mini white chocolate chips
- A pinch of cinnamon
- A splash of maple extract (very Canadian, very good)
FYI, I tried adding peanut butter once. It wasn’t bad… but it wasn’t Moose Farts anymore. :/
Storage & Make-Ahead Tips
Refrigerator
- Store in an airtight container
- Keeps up to 7 days
Freezer
- Freeze in a single layer, then transfer to a bag
- Lasts up to 2 months
I always freeze a batch during the holidays. Emergency dessert stash = lifesaver.
Common Mistakes (And How to Avoid Them)
Too sticky?
Add a tablespoon of graham crumbs and chill longer.
Too dry?
Add condensed milk one teaspoon at a time.
Falling apart?
You probably under-mixed. Stir thoroughly before chilling.
Why This Recipe Works Every Time
This dessert nails the trifecta:
- Fat from condensed milk
- Structure from crumbs
- Texture from coconut
That balance keeps them soft but sturdy. Ever bitten into a no-bake treat that crumbles instantly? Yeah, not here.
Perfect Occasions for Moose Farts
- Christmas cookie trays
- Potlucks
- Baby showers
- Kids’ birthday parties
- “I need dessert in 10 minutes” emergencies
They fit everywhere. Somehow.
Ingredients
Method
- Mix dry ingredients in a bowl.
- Stir in condensed milk and vanilla.
- Chill 20–30 minutes.
- Roll into balls and coat with coconut.
- Chill until set.
Notes
- Chill dough before rolling
- Use unsweetened coconut
- Store refrigerated up to 7 days
- Freeze well for make-ahead desserts