
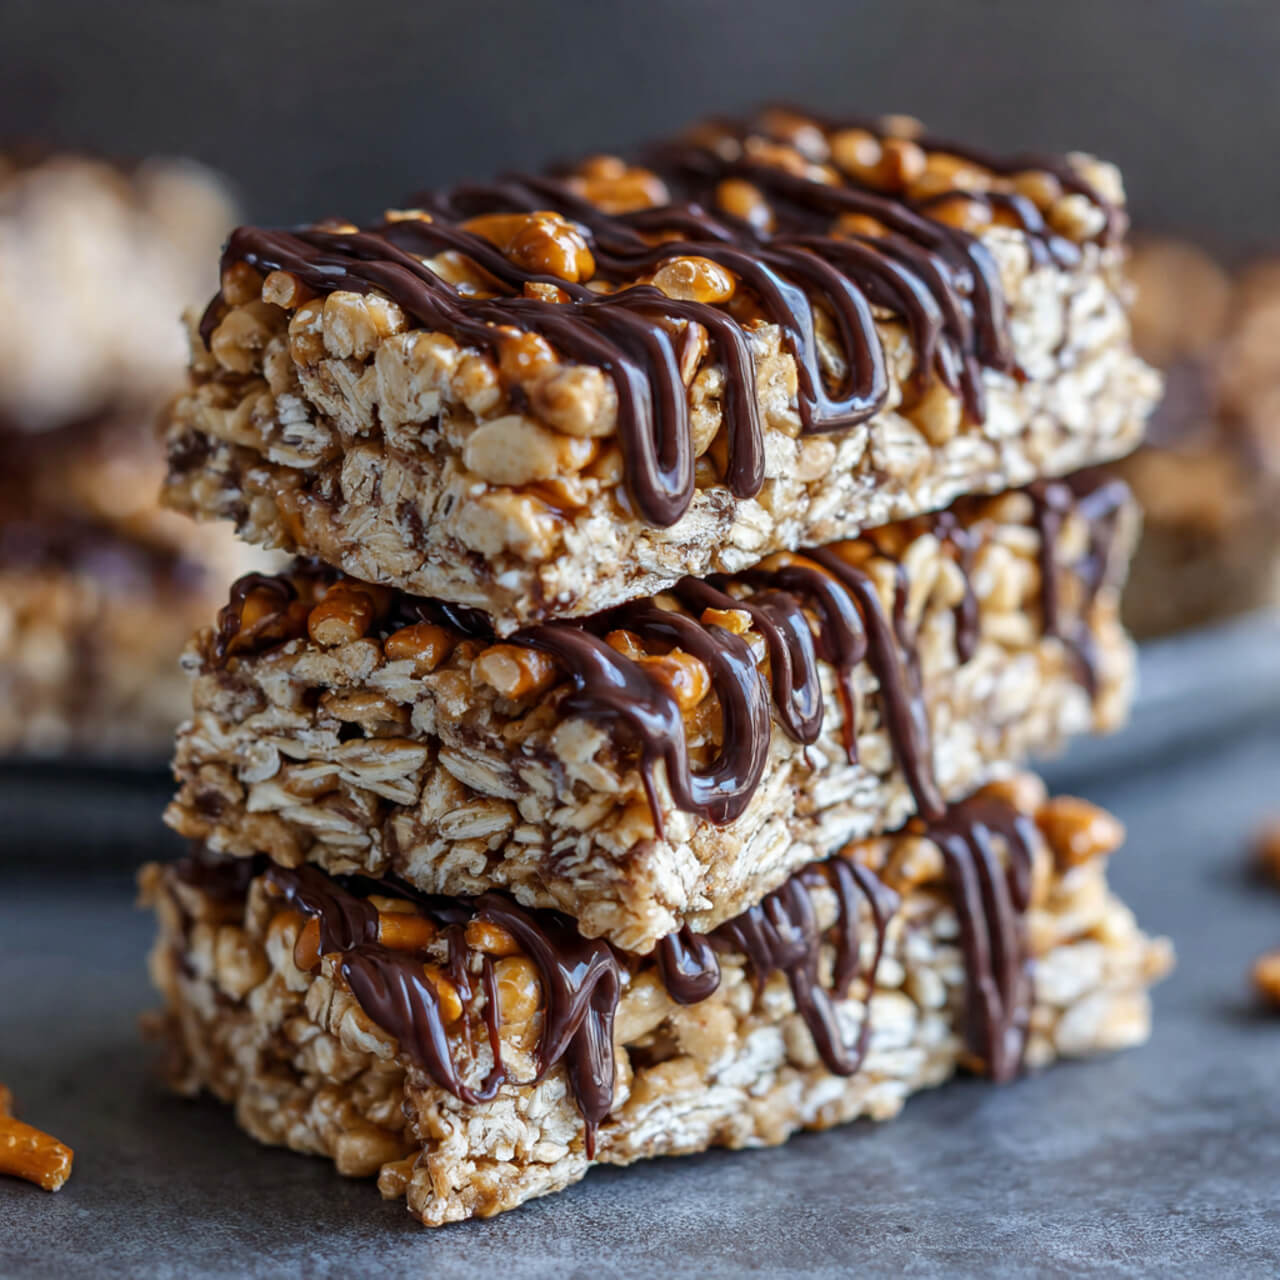
You know those snacks you make because you’re trying to be responsible… and then you end up hiding them from everyone else? Yeah. These no bake peanut butter pretzel granola bars fall squarely into that category.
The first time I made them, I just wanted something quick. No oven. No fancy steps. Something sweet-salty that didn’t come wrapped in plastic. One bite in, I realized I had accidentally created my new favorite snack. Crunchy pretzels, creamy peanut butter, just enough sweetness to feel like a treat—dangerous stuff.
If you love no bake granola bars, crave that sweet and salty peanut butter pretzel combo, and want a snack that actually keeps you full, you’re going to love these. Fair warning though: they disappear fast.
Why These No Bake Granola Bars Always Win
I’ve tested a lot of homemade granola bars over the years. Some crumble. Some taste… healthy (you know what I mean). These? They hit the sweet spot.
No Oven, No Stress
I make these in one bowl and one pan. That’s it. When it’s hot outside—or I just feel lazy—this matters more than I’d like to admit.
That Sweet + Salty Thing We All Love
Pretzels bring the crunch and salt. Peanut butter brings richness. A little honey ties everything together. It’s the kind of balance snack brands chase and rarely nail.
They Actually Feel Satisfying
Thanks to protein from peanut butter and fiber from oats, one bar keeps me full way longer than a store-bought option.
Ever grabbed a “healthy bar” and felt hungry 20 minutes later? Same. These don’t do that.
What Makes These Better Than Store-Bought Bars (IMO)
I still buy packaged bars sometimes. Life happens. But homemade wins for a few reasons.
- No weird ingredients you can’t pronounce
- Custom sweetness (I hate bars that taste like candy)
- Way cheaper per batch
Plus, I control the texture. Chewy, crunchy, or somewhere in between—it’s up to me.
Ingredients That Matter (And Why I Use Them)
Let’s talk about what actually makes these bars work.
Old-Fashioned Rolled Oats
I always use rolled oats, not quick oats. Rolled oats give structure and chew. Quick oats turn things mushy fast.
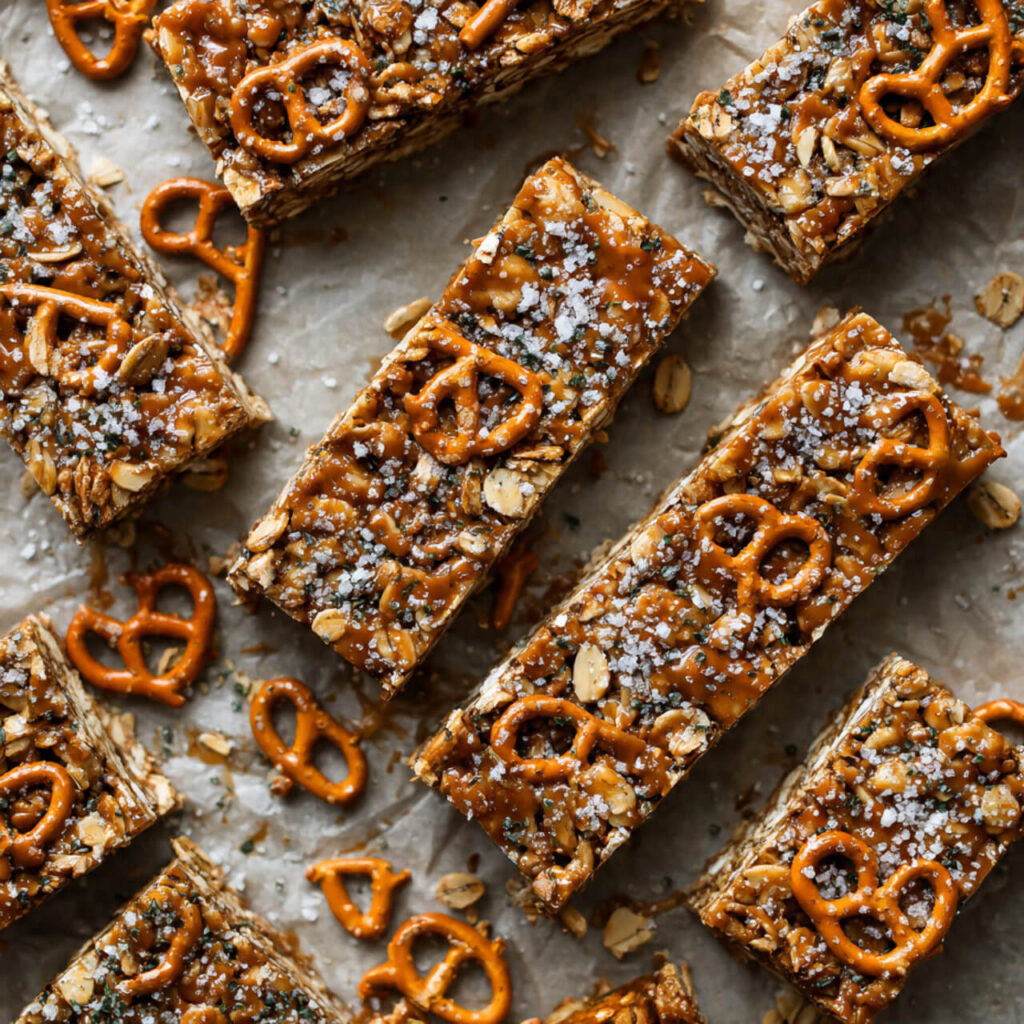
Pretzels
I roughly crush them by hand. I want chunks, not dust. Those salty bites matter.
Natural Peanut Butter
I use creamy, natural peanut butter (just peanuts and salt). It melts smoothly and binds everything without tasting greasy.
FYI, I’ve tested crunchy peanut butter too. It works, but the texture gets very busy.
Honey or Maple Syrup
Honey gives better binding power. Maple syrup works if you want a vegan option, but the bars stay slightly softer.
Chocolate Chips (Optional but Encouraged)
I sprinkle them on top because… joy. Life’s short.
The Pan and Tools I Always Use
You don’t need much, but the right tools help.
- 8×8 baking pan
- Parchment paper (non-negotiable for easy removal)
- Silicone spatula
I also love using a heavy-bottom saucepan for melting peanut butter and honey evenly.
Step-by-Step: How I Make Them
Step 1: Prep the Pan
I line an 8×8 pan with parchment, leaving overhang on the sides. This makes lifting the bars out stupidly easy later.
Step 2: Mix the Dry Ingredients
In a large bowl, I combine:
- Rolled oats
- Crushed pretzels
- A pinch of salt
I toss them together so the pretzels distribute evenly.
Step 3: Melt the Peanut Butter Mixture
In a saucepan over low heat, I stir together:
- Peanut butter
- Honey
- Vanilla
I heat just until smooth. I don’t boil it. Boiling changes the texture and makes the bars harder.
Step 4: Combine Everything
I pour the warm peanut butter mixture over the dry ingredients and stir until everything looks coated and sticky.
Step 5: Press and Chill
I press the mixture firmly into the pan. Really press. This step decides whether your bars hold together.
I chill them for at least 1 hour before slicing.
Common Mistakes (I’ve Made Them All)
Not Pressing Hard Enough
Loose pressing = crumbly bars. I use the bottom of a measuring cup to compact everything.
Too Much Sweetener
More honey does not mean better bars. It makes them overly soft and sticky.
Cutting Too Soon
Warm bars fall apart. Patience here pays off.
Flavor Variations I Rotate Through
Chocolate Peanut Butter Pretzel
Add cocoa powder to the peanut butter mixture and extra chocolate chips on top.
Protein Boost
Stir in vanilla protein powder and add a splash of milk to balance texture.
Peanut Butter Banana
Add freeze-dried banana pieces. Weirdly good.
Ever customize a recipe once and never go back? That’s me with these.
Storage Tips That Actually Work
I store these:
- In the fridge for up to 7 days
- In the freezer for up to 2 months
They taste amazing straight from the fridge, especially in summer.
Helpful Products I Personally Use
If you make no bake bars often, a few tools make life easier.
I love this OXO Good Grips 8×8 Baking Pan
And for stirring thick mixtures, this GIR Silicone Spatula saves my wrists:
Both get used constantly in my kitchen.
Why These Bars Are Perfect for Real Life
I make these for:
- Busy mornings
- Post-workout snacks
- Road trips
- “I need something sweet but not a dessert” moments
They travel well, don’t melt easily, and don’t taste like compromise.
FAQs I Get All the Time
Can I make these gluten-free?
Yes. Just use gluten-free oats and pretzels.
Can I use almond butter?
Absolutely. The flavor changes, but it still works.
Why are my bars dry?
You probably added too many dry ingredients or didn’t use enough binder.
Ingredients
Method
- Line an 8×8 pan with parchment paper.
- Mix oats, pretzels, and salt in a bowl.
- Warm peanut butter, honey, and vanilla over low heat until smooth.
- Pour wet mixture over dry ingredients and stir well.
- Press firmly into the pan.
- Chill for 1 hour before slicing.
Notes
- Press mixture firmly to prevent crumbling.
- Do not boil the peanut butter mixture.
- Chill completely before cutting.
- Store cold for best texture.
Final Thoughts (From Someone Who Keeps These on Hand Always)
No bake peanut butter pretzel granola bars feel like the snack you wish you had growing up. They’re easy, satisfying, and flexible enough to match your mood.
If you try these once, you’ll start keeping oats and pretzels stocked “just in case.” Don’t say I didn’t warn you 😉